Vegetarian

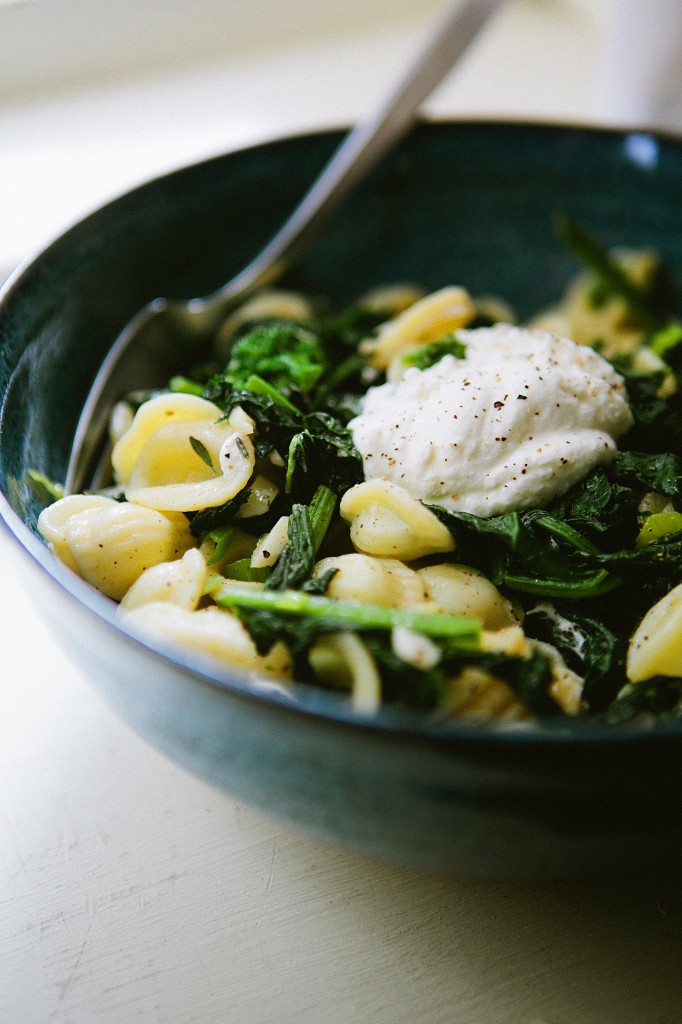
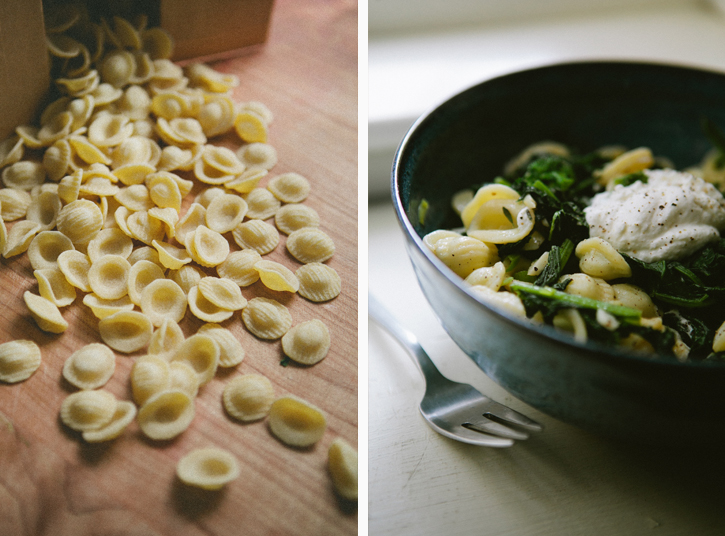
Pasta with Broccoli Rabe and Lemon Ricotta

Eric and I have started the process of looking for a house again after putting things on hold for a bit when I transitioned into freelancing. We’ve lived in the same apartment since we got together.  I moved in after eight months of dating and this place has been good to us.  It has everything we need and is conveniently located within walking distance to Downtown Boston.  But because it’s a rental, we haven’t done much to give it any flare. The walls are white, the furniture a mishmash of things from college and hand me downs from our parents.  Then there’s the furniture we've acquired via Craigslist, which we haven’t replaced because, why would we when we don’t know where we’ll be living?  We’ve been saying that for years.I think we’re both ready to start a home together… one that’s decorated the way we want. One that has a yard for a garden and, ideally, a fireplace.  At least we have a vision, so I hope it won't be an arduous process.


Pasta with Broccoli Rabe and Lemon Ricotta

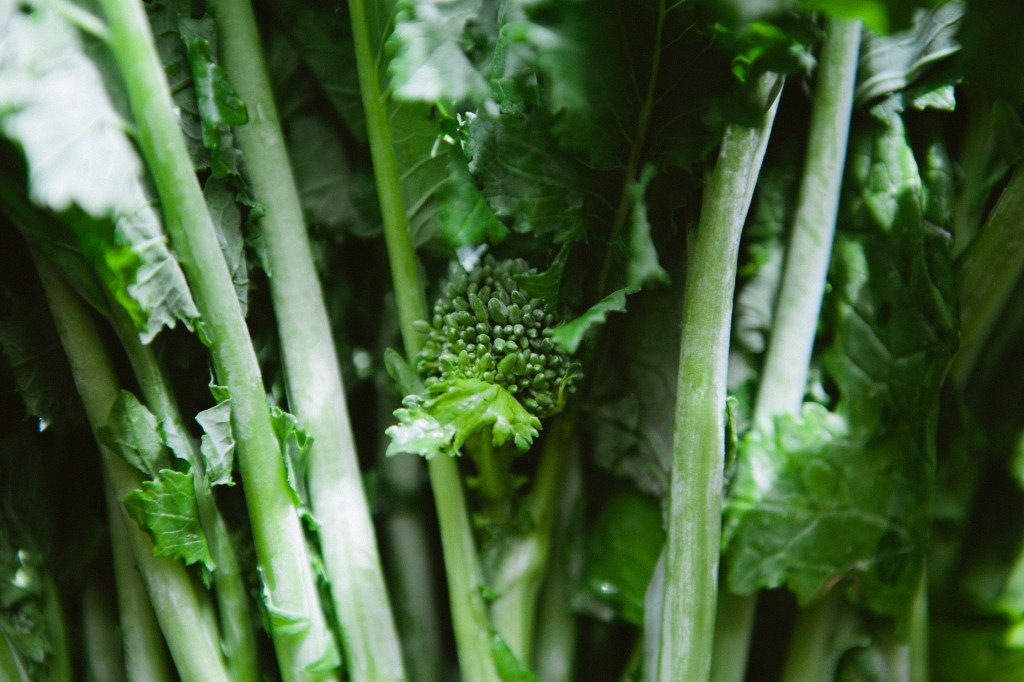
Ingredients 1 lb pasta (the type is your choice, I used orecchiette) 1 lb broccoli rabe, rinsed and cut into 1 inch pieces 4 cloves garlic, minced Extra virgin olive oil Salt Black pepper 1 1/2 cups Ricotta cheese Zest of half a lemon 1 teaspoon fresh thyme

Instructions

1. Bring two large pots of salted water to a boil.  In one pot, boil the chopped broccoli rabe for 3 minutes and drain as much liquid as you can. In the other pot, cook the pasta as directed, until al dente. Drain in a colander.

2. In a large skillet, heat 1 tablespoon of olive oil over medium heat.  Add the broccoli rabe and the garlic.  Toss it around in the oil for about 30 seconds and, if needed, season with more salt. Add the pasta to the pan.

3. In a bowl, whisk together the ricotta and lemon zest until the ricotta becomes smooth.

4. Portion out the pasta into bowls, add a dollop of ricotta  and sprinkle with fresh thyme, some additional salt and coarsely ground black pepper.


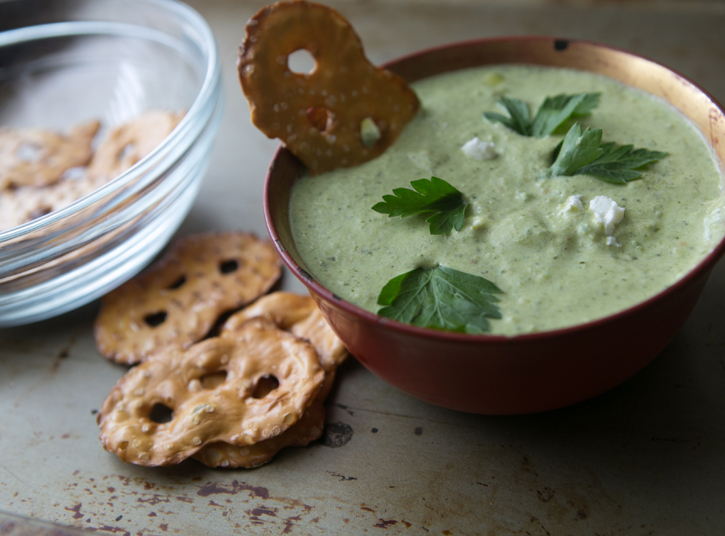
Creamy Tomatillo Dip

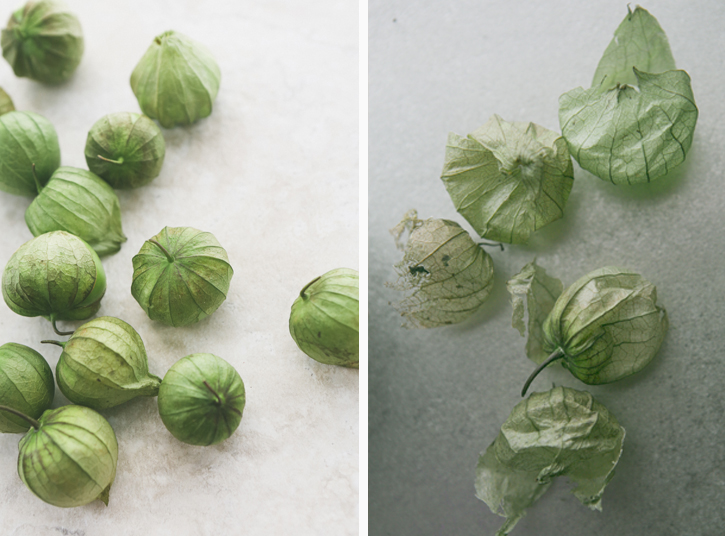
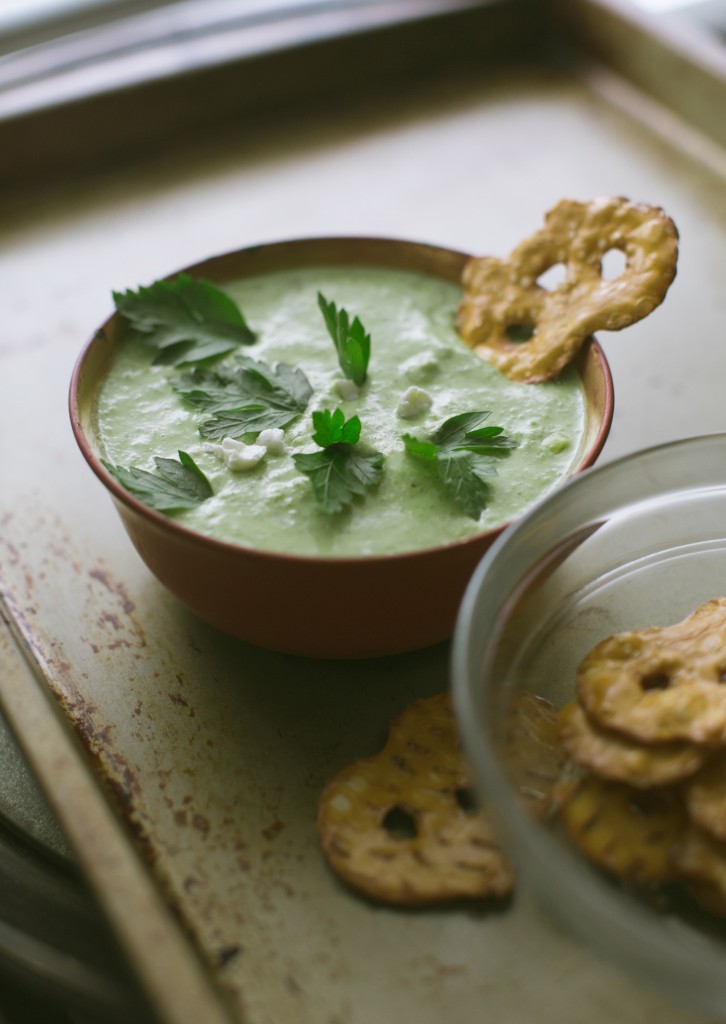
It's funny that just a few days ago, as we prepared for our trip to Texas, our CSA sent us a bag of tomatillo just to get us in the mood. I have a lot of love for these little guys. First off, aren't those husks just so cool? And then there's the flavor. Ever since I first cooked with them, I've been struck by their tartness. Where most dishes need acid to give it a boost, tomatillos have enough that additional lemon or lime juice is unnecessary.

The last time I played around with tomatillos, I turned them into a pesto and tossed them with pasta. Of course, my mind went in a similar direction this time, but to spruce things up, I made a creamy (and spicy) dip. Roasting allows them to blister, adding a bit of smokiness to the dip.

I may or may not post next week (who the heck knows?!?!) as we'll be touring (aka eating and drinking) our way through Austin and Dallas.  We're super excited to spend some time with friends and family. I'm ready for a taco and a margarita! That's what they eat there, right?

Creamy Tomatillo Dip

Tools Baking pan Immersion blender (or a regular blender)

Ingredients 8 oz tomatillos, husks removed 2 serrano peppers, seeds removed 3 garlic cloves, peeled 2 tablespoons olive oil Kosher salt 1/4 cup fresh cilantro 4 oz goat cheese

Tortilla chips, crackers or pretzels, for dipping

Instructions

1. Preheat the oven to 375 degrees.  Line a baking pan with aluminum foil.

2. Toss tomatillos, peppers, and garlic cloves in olive oil and 1 teaspoon of Kosher salt.  Transfer tomatillos and peppers to the prepared baking pan. Roast for 20 minutes, or until the skin of the tomatillos and peppers become blistered. Remove from oven and let cool for a few minutes.

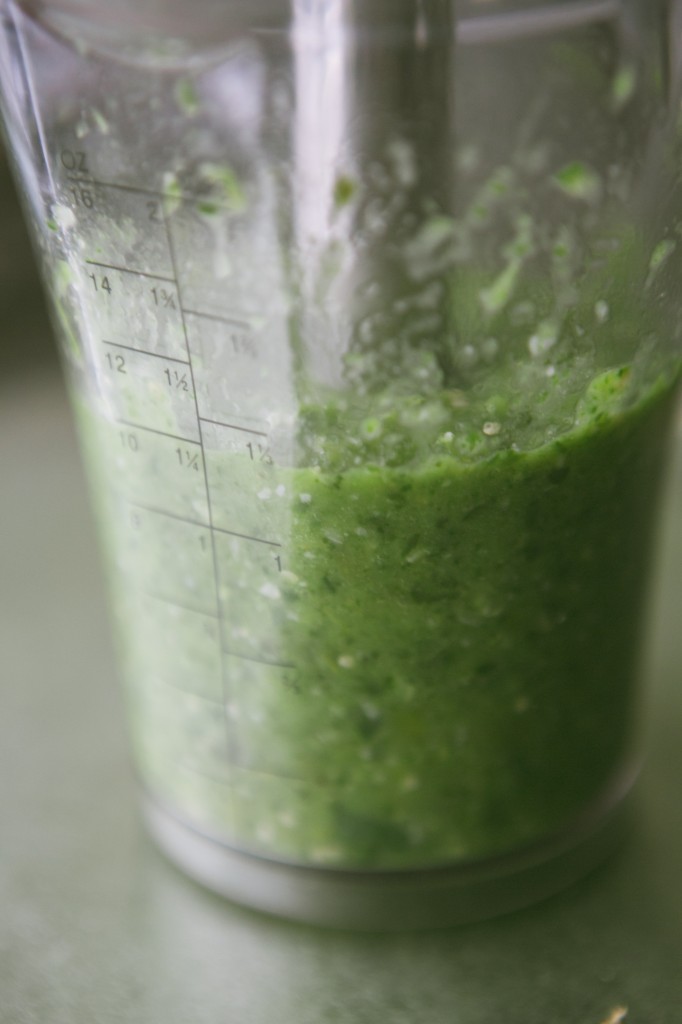
3. Transfer these ingredients to a large bowl (or use the large measuring cup that comes with most immersion blenders) and puree with an immersion blender. Alternatively, you can use a regular blender to do this.  Add cilantro and goat cheese and blend to incorporate.

4. Check for seasoning and, if necessary, add additional salt.  Serve with tortilla chips or crackers.

Blueberry, Beet and Feta Salad

The other week I headed out for the farmer's market at Copley Square, my camera tucked in my backpack.  It was one of those days when merely stepping outside resulted in sweat-drenched clothes, but for some psychotic reason I decided to walk there.  The path from my apartment in South Boston to the market takes you through an array of neighborhoods and scenery.  Every time I do this walk, I see a detail of the city that I'd never noticed before.  It could be a mural on the side of a building or a hidden park down a side street.

The shaded kiosks at the market provided enough protection to make it a pleasant trip.  I strolled around for a while, poking into each tent to marvel at the gorgeous produce.  I couldn't help but touch everything.  This is what carrots are supposed to look like!  And aren't these beets stunning?  My fellow patrons look over at me, laughing and nodding in agreement.   There was no way I was going home without a few ingredients.

Is it weird that the thing I enjoy preparing most are salads?  Even as a teenager, there was nothing that excited me more than chopping veggies and whisking together a vinaigrette.  This is how I started to learn how to cook, and I guess it's why it's stuck with me all these years.

The true pleasure in eating salad is that often the ingredients are left unaltered or cooked in a way that lets their natural flavors shine.  This blueberry, beet, and feta salad wasn't exactly what I had in mind when I got started on developing this dish.  Honestly, I'm not sure what my vision was.  I was hoping for something leafy, but when the bowl developed and I saw how striking the colors were and that the flavors and textures were layered, I knew this was something that needed to be shared.

[print_this]

Blueberry, Beet and Feta Salad

Ingredients

1 bunch (6 or 7) small golden beets 1 pint (2 cups) blueberries 1/2 cup feta 3 basil leaves, chiffonade 1 1/2 tablespoons extra virgin olive oil 2 teaspoons lemon juice 3/4 teaspoon lemon zest Salt and pepper, to taste Honey

Instructions

1. Put the beets to a pot of water and bring to a boil.  They are finished cooking when a sharp knife goes into one easily. Run cold water over the beets and let sit until cool enough to handle.  Once they have cooled enough, they can be peeled.

2. Quarter the beets (or cut smaller if the beets are larger) and transfer to a bowl.  Add the blueberries and feta to the bowl.

3. In a separate bowl, whisk together the olive oil, lemon juice, and lemon zest.  Pour over the salad and toss to combine.

4. Season with salt and pepper and sprinkle basil on top. Drizzle a little honey on top and serve.

[/print_this]

Corn and Kale Panzanella

There was a point a few weeks ago when I just wanted to call a timeout.  What was already a pretty packed July was rapidly getting busier.  The e-mails, the requests, and the invitations kept coming in.  I have trouble saying no. This is especially true when it comes to work, but it occurs with other engagements as well. A dinner? Sure! A trip? Of course!  I want to agree to it all, afraid that declining will result in a missed opportunity.  But I hit a point when I just had to politely inform folks that I was booked for the next month.

Today, however, marks a number of deadlines for me.  I've been working on a few marketing campaigns and a cookbook shoot for the last month and a half and the majority of the work wrapped this past weekend.  I'm taking the day off before I gear up for three full days of work.  Despite the heat and humidity, I'm heading outdoors, picnicking in the Boston Common where a music festival is currently underway.

Before leaving you with today's recipe (or, in this case, a link to a guest post I did), I wanted to direct you all to the summer issue of FoodieCrush Magazine.  If you don't already know about it, stop whatever you're doing and check it out.  It's a beautifully designed publication from my friend Heidi and I'm so honored to have contributed photography for the last couple of issues.  Oh, and it's FREE! Check it out here (and page 42 for the article I contributed to).

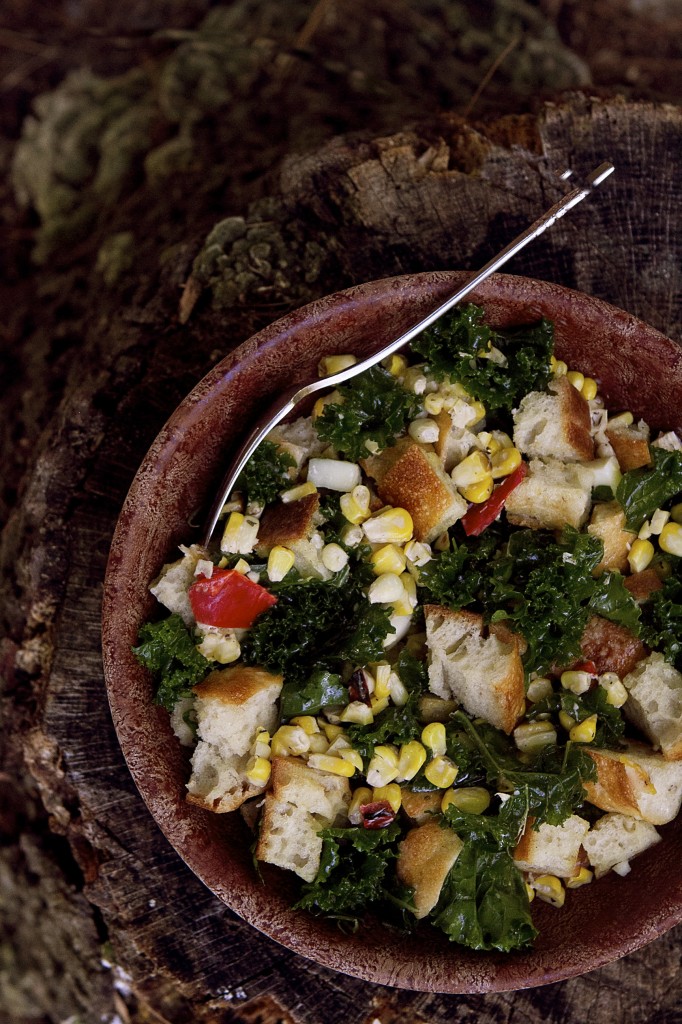
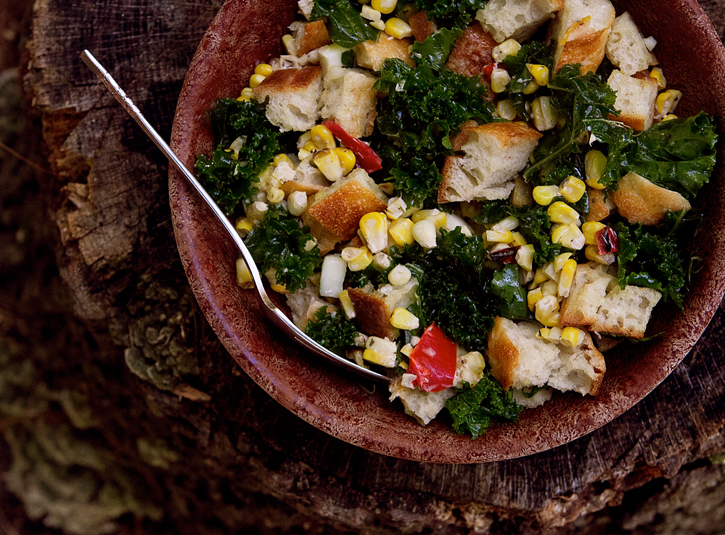
Now, onto the guest post! The folks at Better Homes and Gardens asked me to take one of their recipes and give it a twist.  Originally, I had thought that a lightly dressed panzanella with some kale thrown in would do the trick, but I found that it actually wasn't all that interesting.  Shaved corn and some chopped roasted red pepper added the sweetness (not to mention a shock of color) that the dish needed.

Click over to see the original panzanella recipe from Better Homes and Gardens and to check out some of my alterations.

Spicy Carrot and Quinoa Tabbouleh

Yesterday afternoon I looked at Eric and suggested that maybe we head back to Boston in the morning. Yes, we'd have to wake up at 5:30 to give ourselves enough time to get to work, but it's totally worth it.  It would mean another sunset, a few extra glasses of wine, and, most importantly, additional time surrounded by nature... rustling leaves, chirping birds and croaking frogs, and the soft, repetitive sound of rippling waves hitting the dock.

This weekend was rejuvenating. Amidst the stress in our lives, we took these few days to have some friends on the Cape to eat, drink, and play Taboo. Unfortunately, we need at least a few days to get into vacation mode (isn't that sad?) so when we all began chatting about departing, a few of us suggested that calling in sick to work would be a good idea (unfortunately, Facebook ruins this).  We just all felt like this was what we needed right now... some time to clear our heads, to enjoy the presence of close companions, and indulge in epic feasts.

Before our journey down here, I made sure to have a few containers of food prepared. When I was making this bowl of tabbouleh and frantically photographing each ingredient, something I completely neglected was that I'd already posted a quinoa tabbouleh.  The good thing, though, is that they are quite different from one another.  The first is loaded with tomatoes and cheese and beets and can stand on its own as a meal, where as this is definitely a taboulleh that you serve with other dishes, like hummus and pita and all that good stuff.  But I do apologize.  I hope you're not sitting there at your computers, completely bored by the site of this bowl.  I promise, though, it's quite delicious and worth giving it a try.

Spicy Carrot and Quinoa Tabouleh

Yields: 4-6 servings, as a side

Tools Pot, for cooking quinoa Whisk

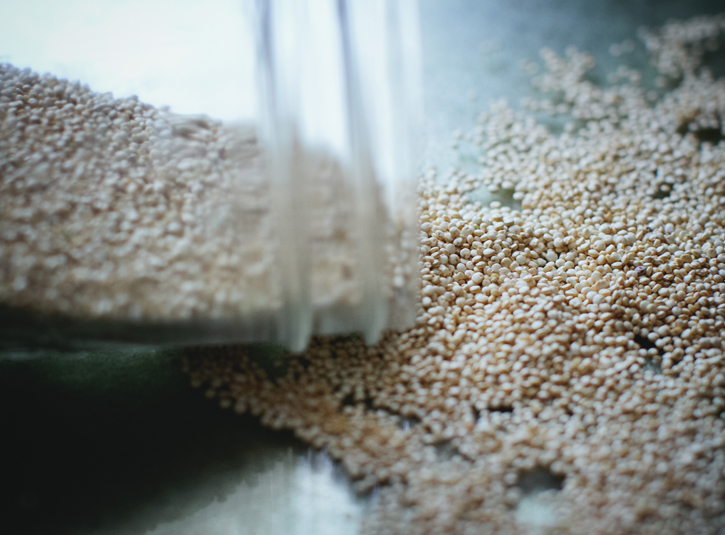
Ingredients 1 cup quinoa, rinsed and drained in a colander 2 cups veggie broth 4 large carrots, grated 1/4 cup walnuts, coarsely chopped 1 tablespoon chopped shallot 2 tablespoons lemon juice 1/4 cup finely chopped flat-leaf parsley 1/4 cup finely chopped mint 1/2 teaspoon allspice 1 jalapeño or serrano pepper (depending on the amount of heat you want), seeds removed and finely chopped 1 teaspoon kosher salt

Instructions

1. To cook the quinoa, add the veggie broth to a pot and bring to a boil.  Stir in the quinoa, cover and reduce heat to medium low.  Simmer until all the veggie broth has been absorbed, approximately 15 minutes.  Remove from heat and let cool.

2. Once it has cooled, transfer the quinoa to a serving bowl.  Stir in the carrot and chopped walnuts.

3. In a separate bowl, stir together the shallot, lemon juice, parsley, mint, allspice, serrano pepper, and 1/4 teaspoon salt.  Add this to the other bowl and stir until it is evenly distributed throughout the quinoa and carrot mixture.

4. Let sit for 30 minutes before eating.  Test for seasoning and, if necessary, add more salt.

Pasta Tossed With Mint Pesto, Asparagus, and Shiitake Mushrooms

I'm keeping things short and sweet today, folks.  There's a ton of work piling up and instead of getting it done, I'm here slackin' off.  But, heck, sometimes we need to play a little, right?  I'm currently in the middle of a cookbook shoot and I have some other fun projects coming up, including an iPhone food photography class I'm teaching next week at a local Whole Foods.  I've taught one on one classes before, but this is going to be quite different.  Actually, I'm really excited about it.  We're starting off the class by going around the store, taking pictures of the various produce, cheese, and fish displays.  From there, we're going to do have a little cooking class and, as we prepare each dish, I'll go over some ways to style and shoot the food.

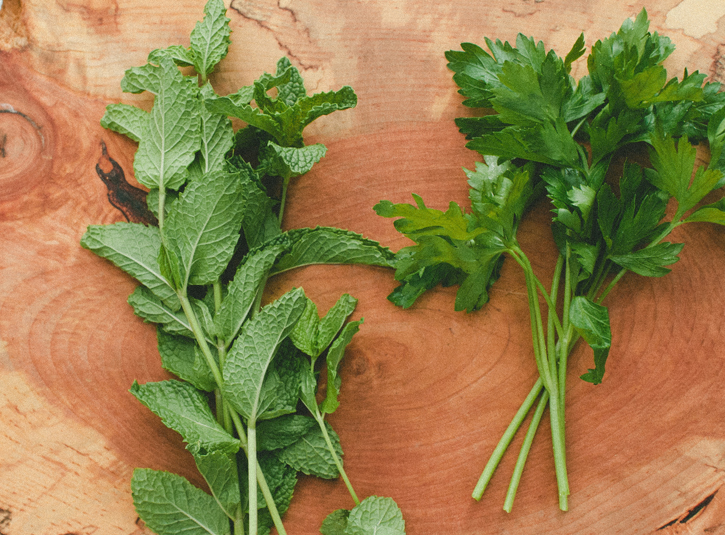
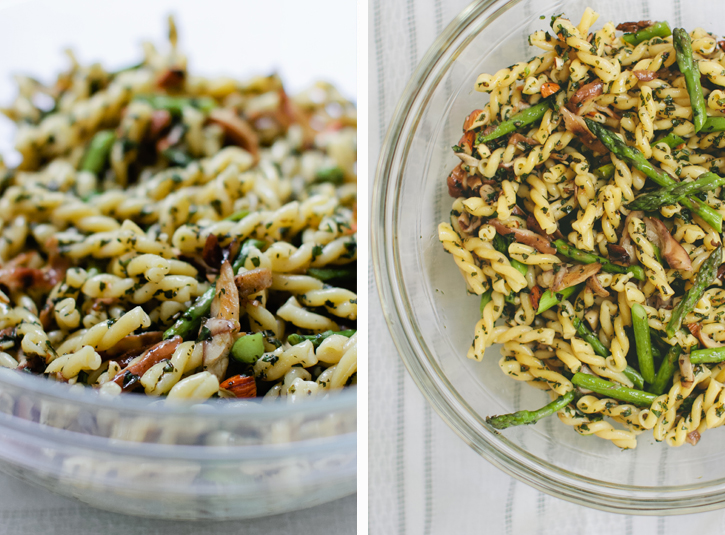
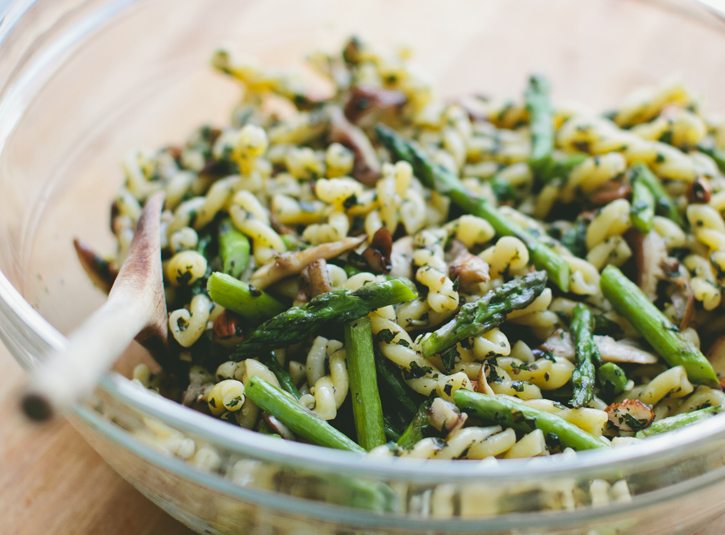
So, yeah, I'm feeling a little overwhelmed by things, but I didn't want all of this to stop me from posting.  I've had mint pesto on my mind a lot recently.  I first had it at a restaurant years ago and my mind was blown by how refreshing it was and how wonderfully it paired with other spring produce, like asparagus.  Here, I've tossed it up into a big pasta dish and have included one of my other favorite seasonal ingredients... mushrooms.  Enjoy!


Pasta Tossed with Mint Pesto, Asparagus and Shiitake Mushrooms

Yield: Serves 4-6

Tools Chef's knife Large pot (for cooking pasta)

Ingredients 3/4 lb pasta, such as penne, gemelli or cavatelli (not long pasta) 2 1/2 cups mint leaves, stems removed, rinsed and dried 1/4 cup whole almonds, chopped 1 garlic clove 1/4 cup olive oil, plus 1 tablespoon 1/2 cup finely grated parmesan cheese 1 lb shiitake mushrooms, sliced 3/4 lb asparagus, ends trimmed and stalks cut into 1 inch pieces Salt and pepper Zest of 1/2 a lemon

Instructions

  1. Put a pot of salted water on the stove and bring to a boil.  Cook the pasta as directed on the box.
  2. While it is cooking, prepare the pesto.  You can do this in a food processor, but I like doing it by hand, so as to not turn the pesto into mush.  To do it by hand, place the garlic clove on a large cutting board and add 1/3 of the mint leaves on top of that.  Using a large chef's knife, chop the leaves and the garlic. Once it is finely chopped, add another 1/3 of mint leaves and continue chopping.  Repeat with the remaining mint.  Once this is done, add the chopped almonds on top and chop until they are incorporated into the pesto.  Add the cheese on top and chop and fold into pesto mixture to combine.  Add this mixture to a bowl and stir in 1/4 cup olive oil. Set aside.
  3. At this point, the pasta should be finished cooking.  Drain and let cool as you cook the asparagus and mushrooms.
  4. In a medium skillet, heat 1 tablespoon of olive oil over medium-high heat.  Add the mushrooms to the pan and let cook for a minute. Add in the asparagus and season with salt and pepper.  Cook for an additional 2-3 minutes, or until the asparagus is bright green and, when you taste a pieces, it remains slightly crunchy.
  5. In a large serving bowl, toss the pasta with the pesto, making sure to coat each piece evenly.  Mix in the mushrooms, asparagus, and lemon zest.  Taste for seasoning and, if necessary, add additional salt and pepper.


Potato Salad with Dill + Horseradish Aioli

What a week!  Actually, what a month!  I can't believe May is wrapping up.  Feels like I always say that.  It's so odd how time just flies by.  The burst of travel hasn't helped with slowing things down.  And next week I pack up for a few days in Vegas, where I'll be attending the Saveur Blog Awards (our little project, The Boys Club, won the Best Cocktail Blog category).  As soon as I mentioned the win to Eric, he scurried off to his computer to look at flights.  Having never been to Vegas, we're doing it up... fancy dinners, theater tickets (Eric's birthday is coming up as is our wedding anniversary, so this is our big celebration).  No gambling though... I'm not a fan, though I have a feeling he might hit the tables while I'm off doing foodie things.

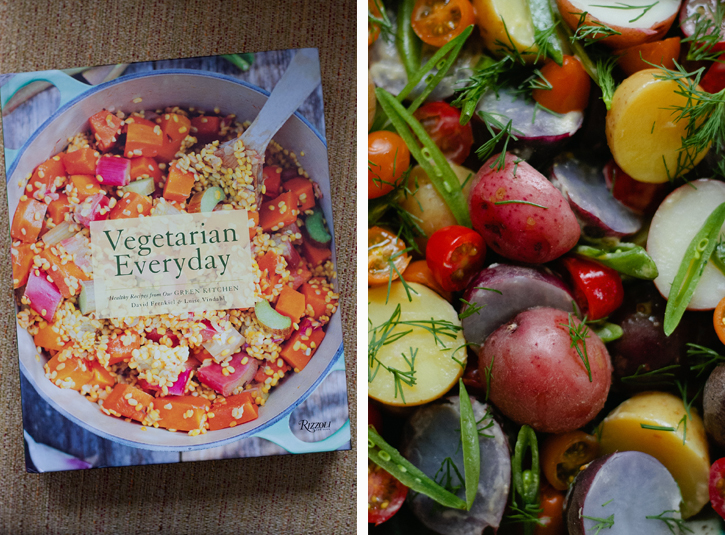
There are no words to express how excited I am to finally get to meet the bloggers going to this event.  Some of my favorites are going to be there, including David and Luise, creators of the blog Green Kitchen Stories, who have just come out with their book, Vegetarian Everyday.  Often when I'm asked which sites are my favorites, I rattle of a long list, but between you and me, GKS is at the top.  I've been a fan of theirs for a long time and am so thrilled for their much deserved success (a wonderful mobile app, a cookbook, and a Saveur award all in twelve months).  So, yeah, I'm kind of psyched to meet them next week.

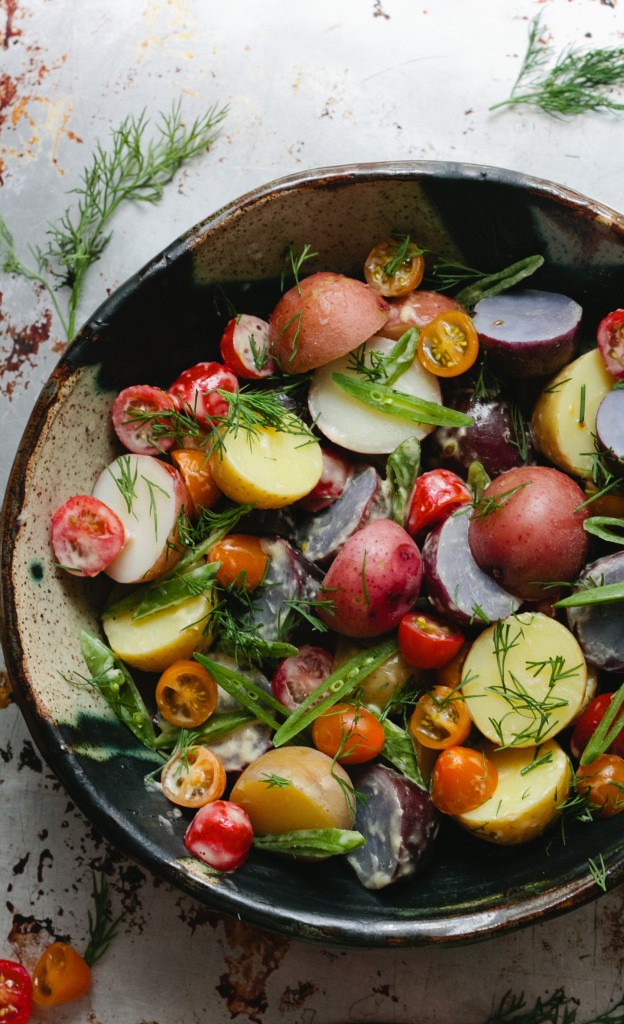
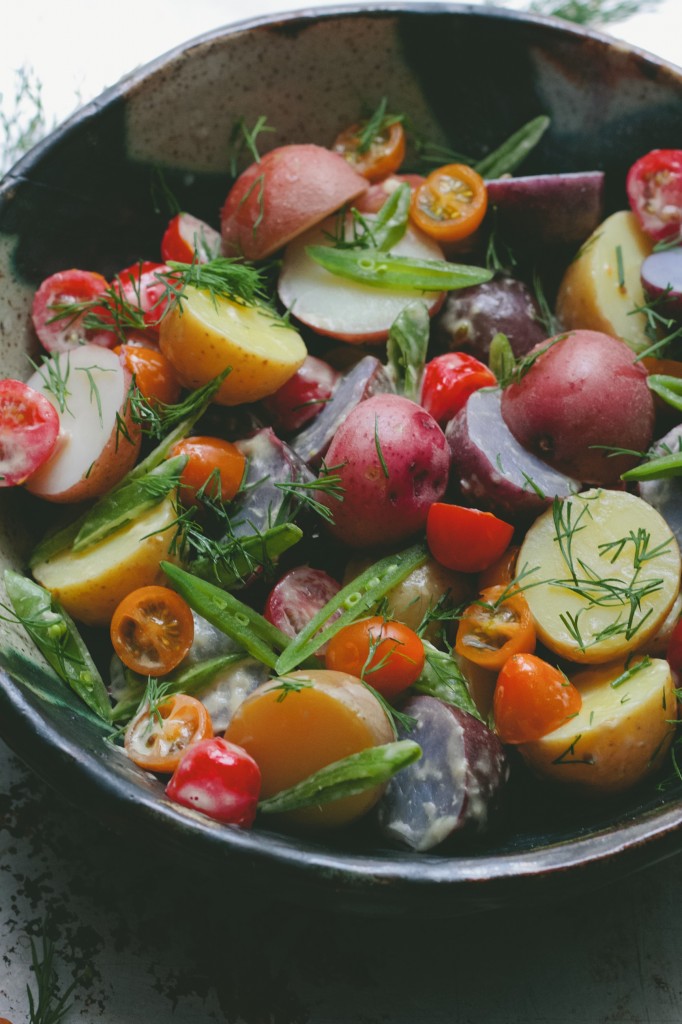
While flipping through Vegetarian Everyday, the dish that tantalized me the most, surprisingly, was their potato salad.  It's a stunner... never had I seen a potato salad with such vibrant colors and flavors. I knew immediately that I had to make it and get it up here before the Memorial Day weekend.  I've taken some liberties and incorporated homemade aioli into it.  Their recipe is definitely healthier than mine, but I'm a mayo fan and it's not potato salad in my world without a little of it thrown in.

Potato Salad with Dill + Horseradish Aioli

Source: Adapted from Vegetarian Everyday by David Frenkiel + Luise Vindahl

Yield: Serves 4

Tools A pot, large enough to cook the potatoes Medium bowl Whisk

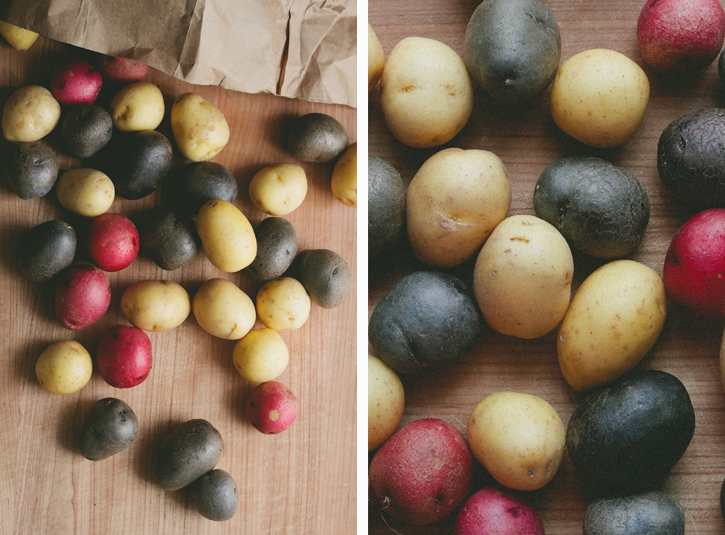
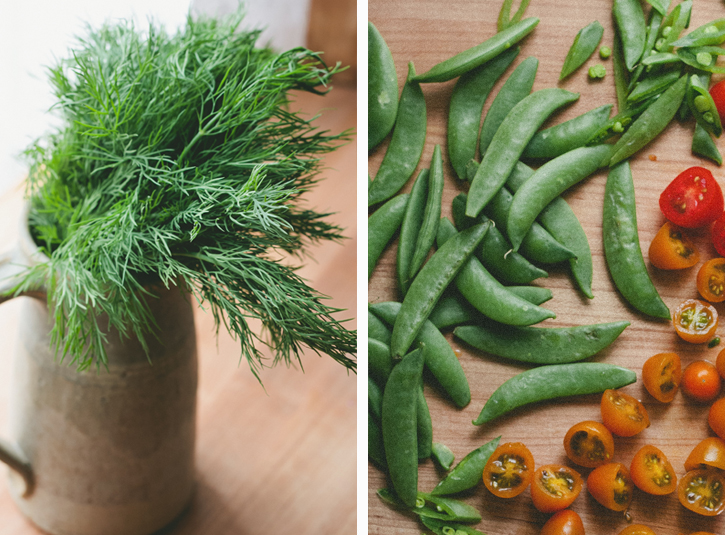
Ingredients 2 lb - 3 oz small new potatoes 15-20 red and yellow cherry or grape tomatoes, halved 2 cups fresh sugarsnap peas, sliced lengthwise 1 large handful of fresh dill, coarsely chopped Kosher salt and freshly ground black pepper, to taste

Horseradish Dressing 2 egg yolks 2 teaspoons lemon juice 1 teaspoon kosher salt ¾ cup canola oil 1 tablespoon prepared horesradish

Instructions

  1. Place the potatoes in a saucepan with just enough cold salted water to cover. Bring to a boil then reduce to simmer for 15 minutes.  Test with a small sharp knife. If the potatoes fall off the knife, they're done.
  2. Drain and set aside to cool.
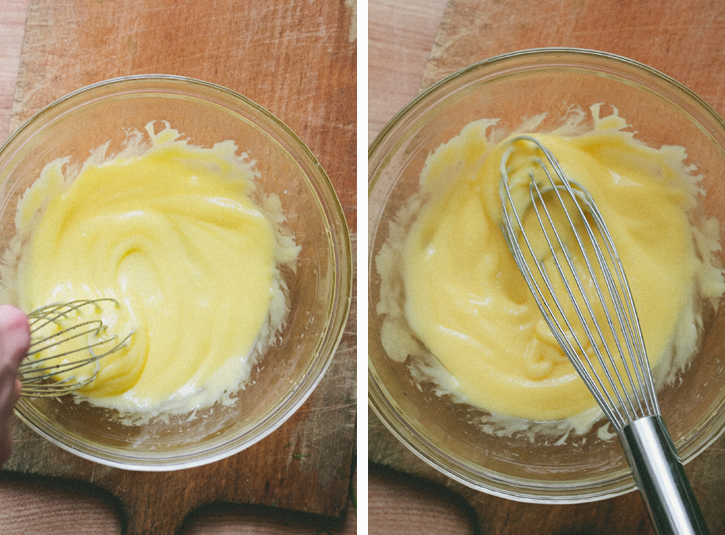
  3. To make the horseradish dressing, whisk the egg yolks, 2 teaspoons lemon juice, and 1 teaspoon salt.   Slowly drizzle in the canola oil while whisking nonstop until the mixture begins to emulsify.  Continue to whisk in the oil until mixture has achieved a thick, mayonnaise-like consistency. Whisk in the horseradish and, if necessary, season with additional salt and pepper.
  4. Combine the tomatoes, peas and dill in a large serving bowl.
  5. When the potatoes have cooled, transfer them to the serving bowl.  Pour the dressing over them and toss with your hands to coat with the aioli.  Serve.


Cheese Grits with Fiddleheads and Ramps in Brown Butter

IMG_8655IMG_8104

I've been on the road a lot recently.  Well, not just the road, in the air as well.  It makes writing a bit challenging, so I usually get most of my posts down on my iPhone. Whenever I mention this to people, they always shake their heads... they can't imagine typing that much with their thumbs. I find it freeing though. Grammar and spelling become less important and I'm able to focus on my thoughts. I'm not a natural writer and often struggle to find the words to convey what I'm feeling. But this little keyboard allows me to get it out without over-thinking it.

As I mentioned, I've been traveling a lot these last few weeks. It started at the end of April with a whirlwind trip out to Los Angeles by way of New Jersey. After a long weekend out west for the Big Traveling Potluck, I returned to my parents house to help out as my mom recovered from an operation.  It was nice to be there... to be with my family and the daily routine of things, even though it was obviously a very hard time for my mother.

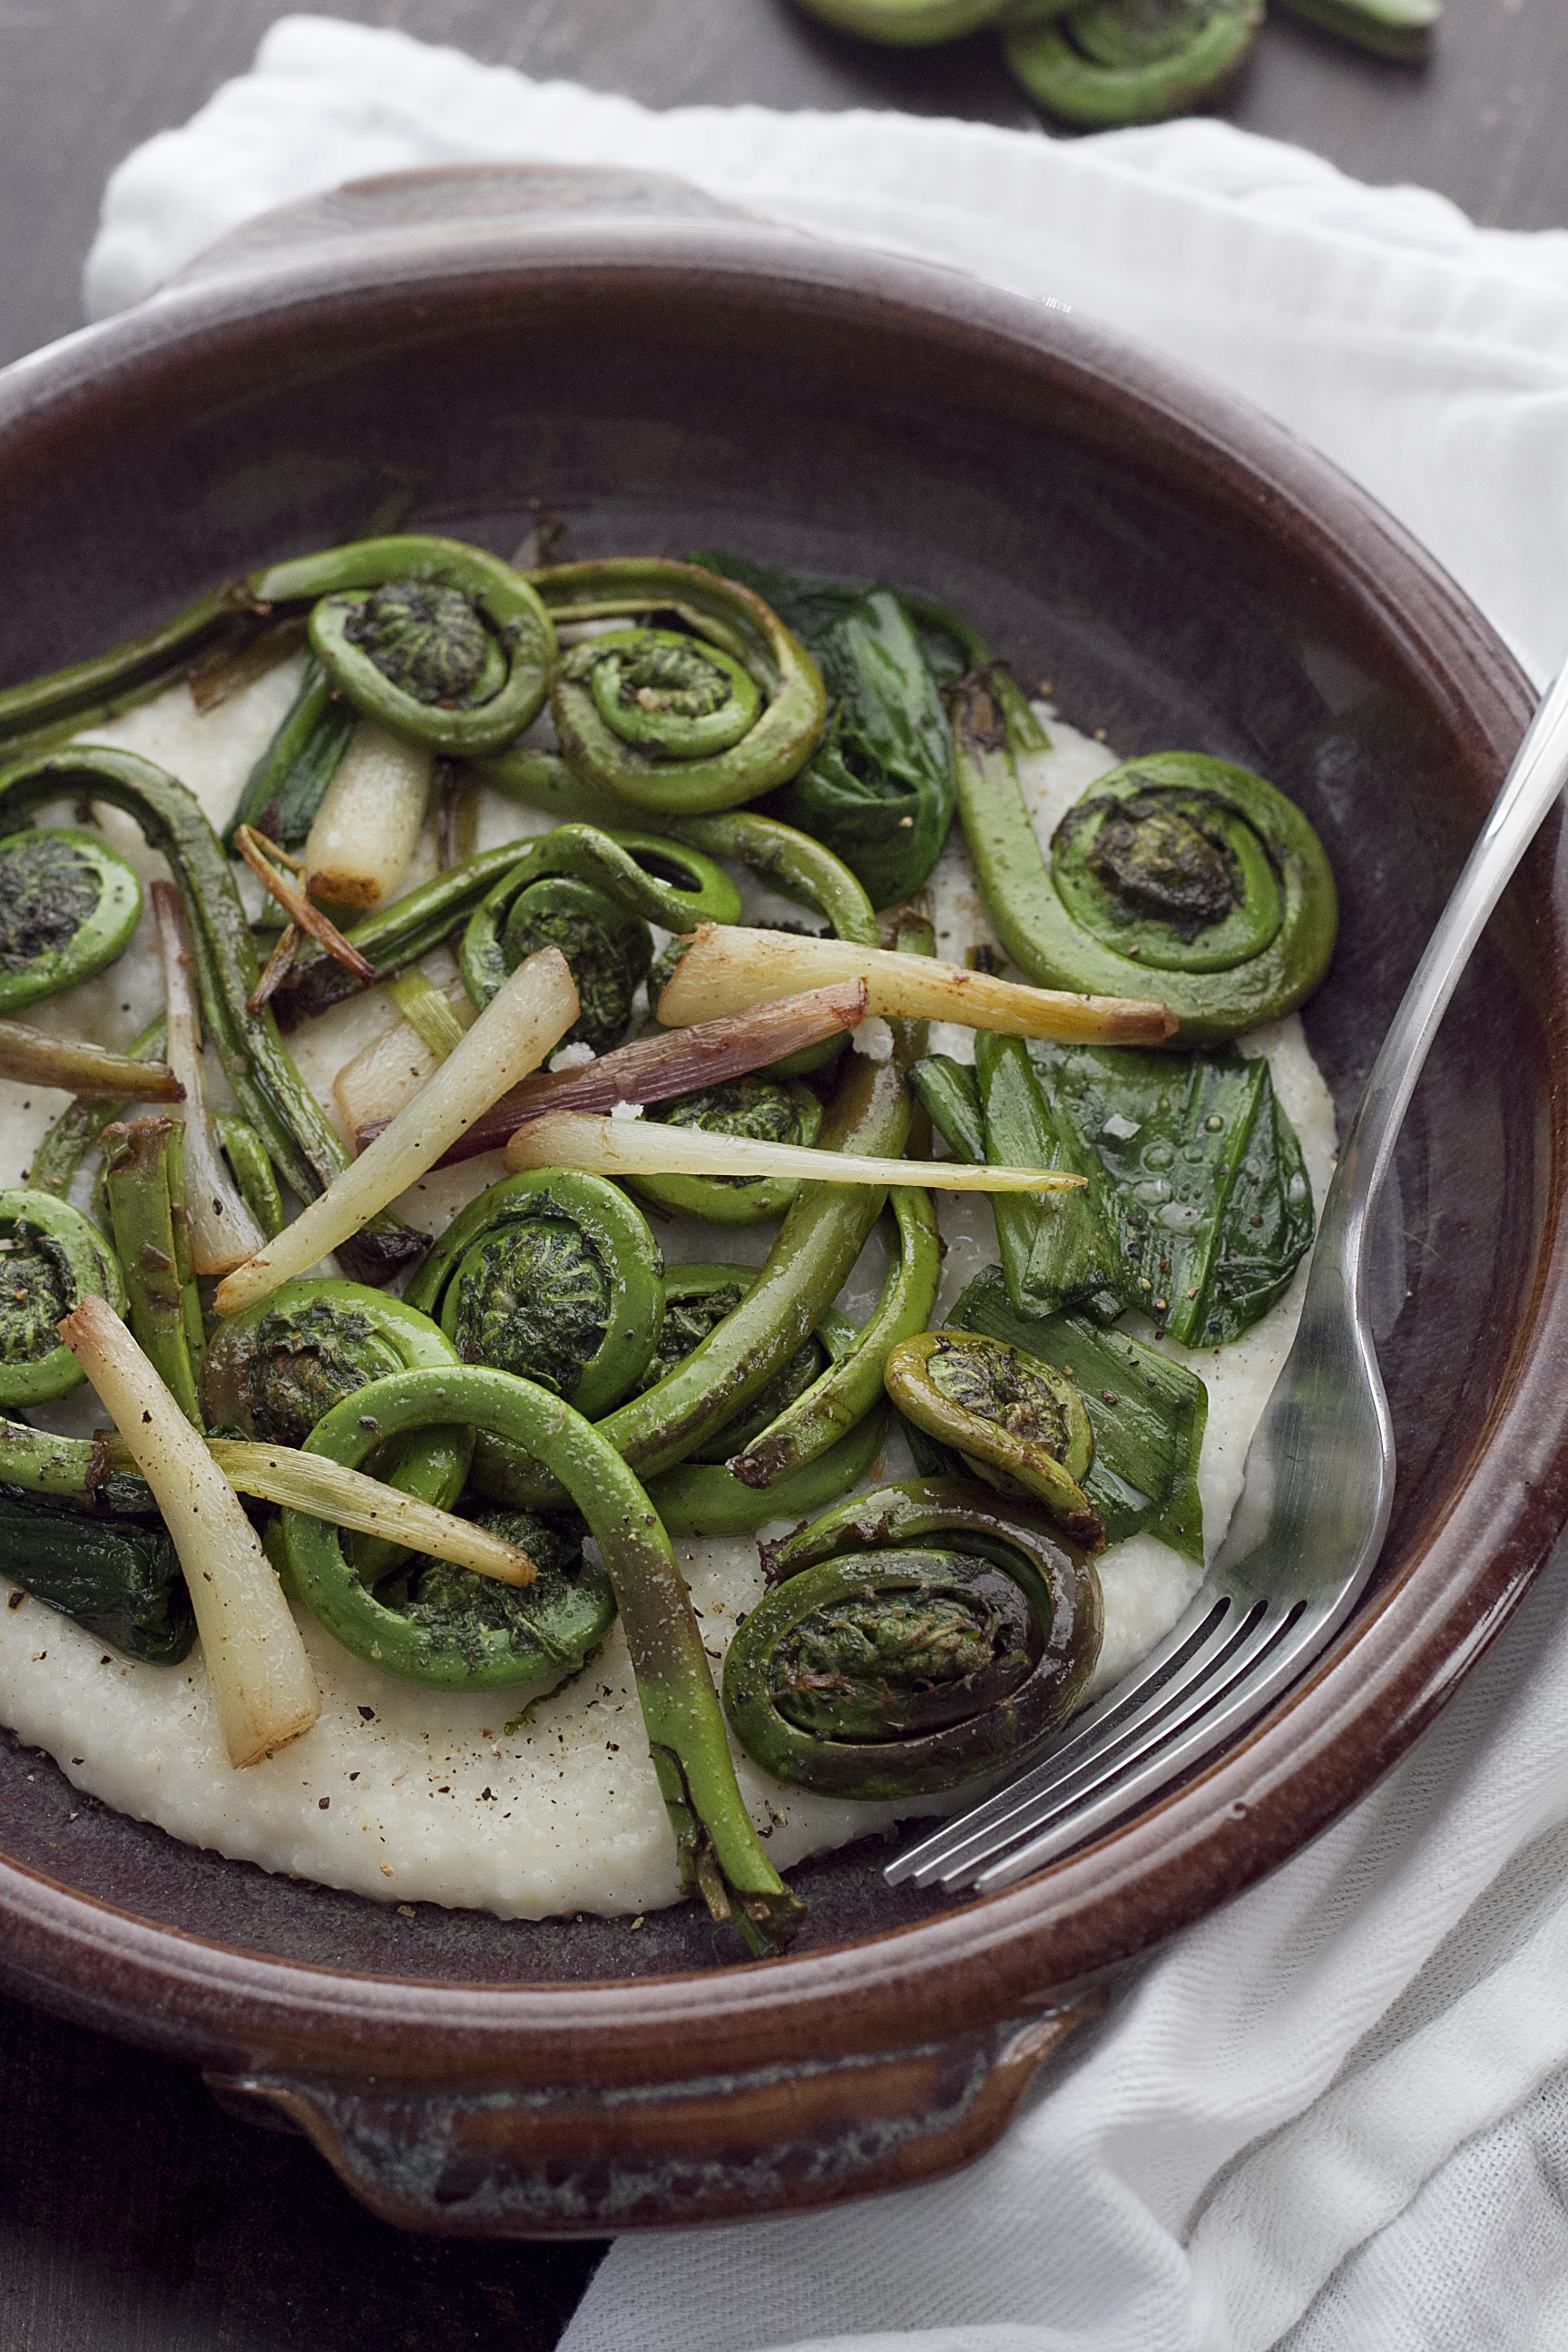
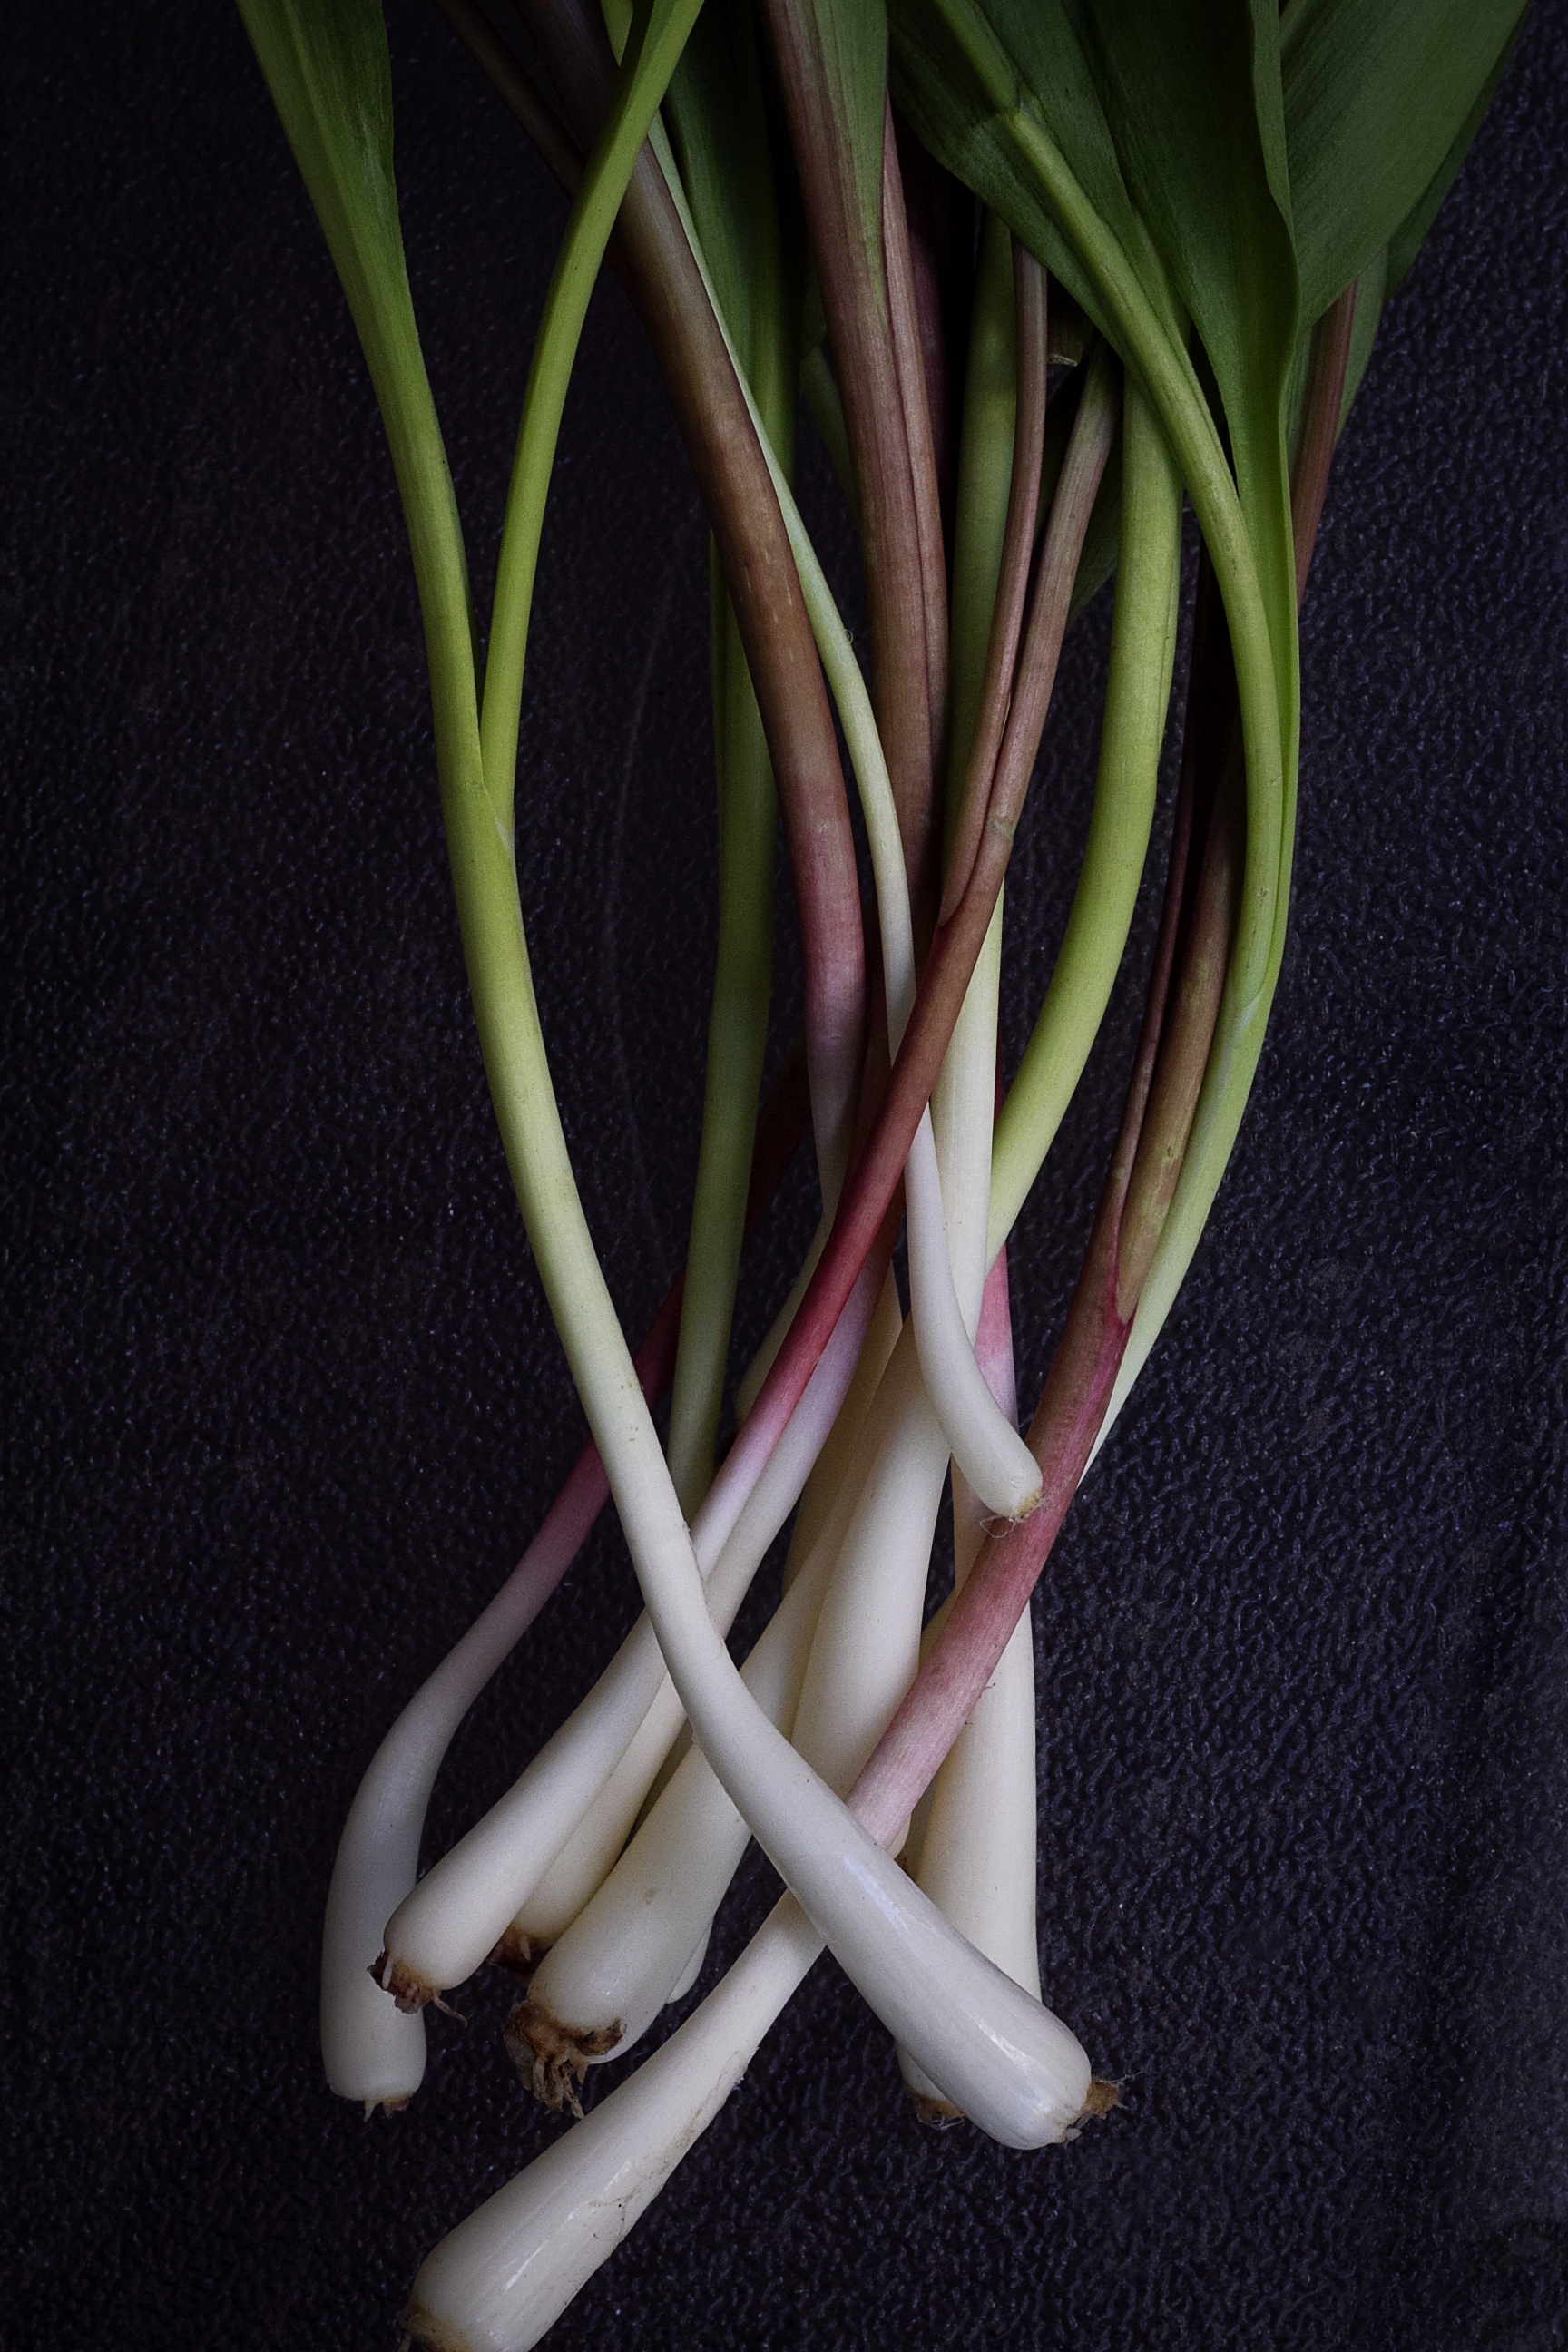
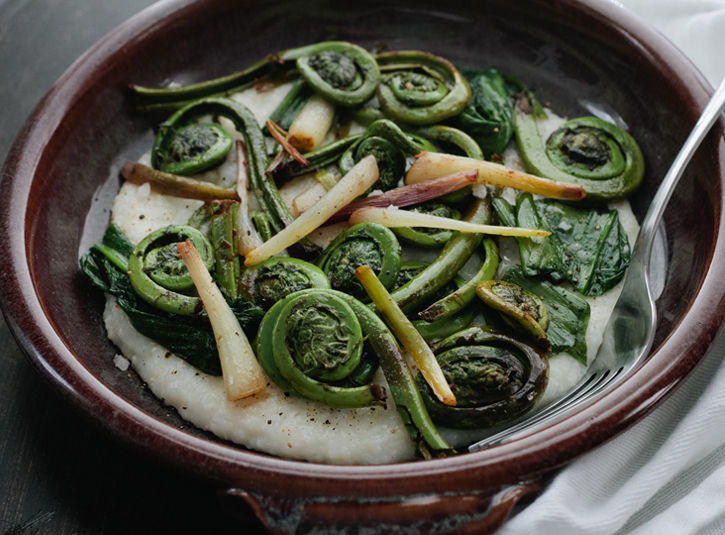
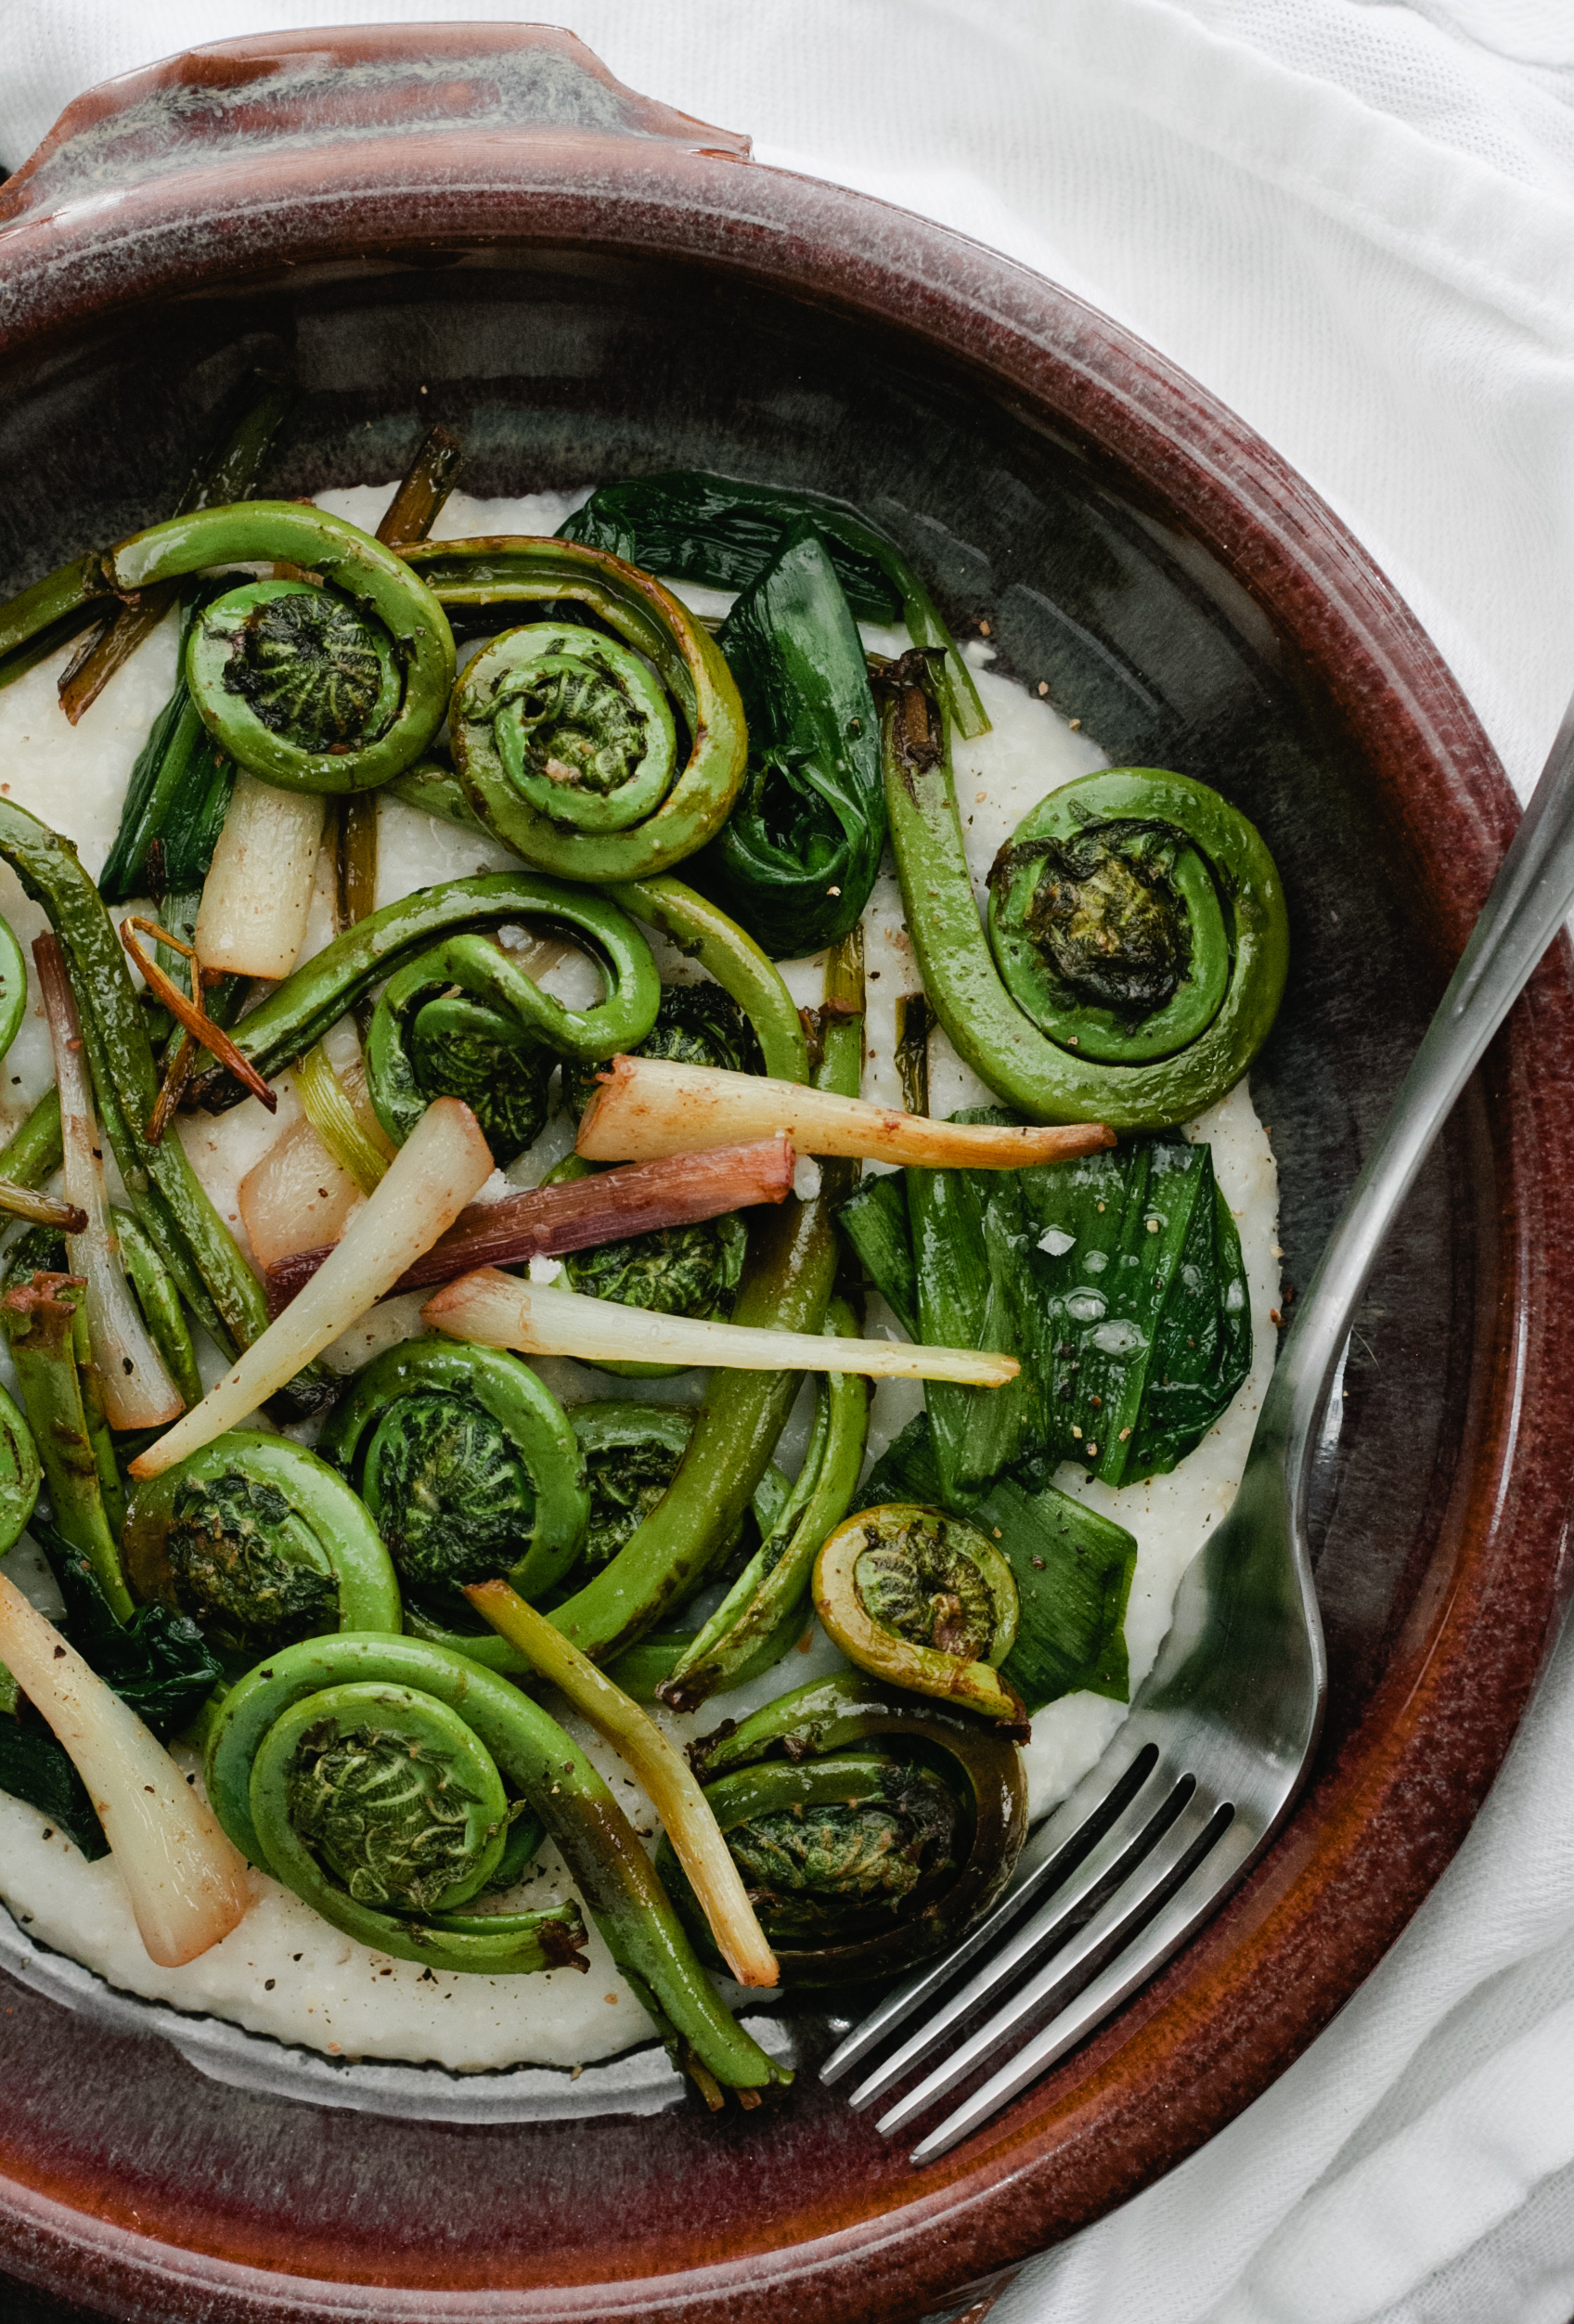
When I returned to Boston, things didn't slow down. I've been fortunate enough to work on some great projects that have kept me pretty busy.  There were a few slow days this last week where I got to create some recipes that have been stewing in my brain for a bit.  One was this bowl of grits topped with two of my favorite seasonal ingredients: fiddlehead ferns and ramps.  I kept the dish fairly rustic.  My goal was to create a comforting dinner for a rainy spring night that would stick to your ribs a little.  With a bit of brown butter and cheese mixed into the grits, I would call this one a huge success.

Now my thumbs are tired. I'm going to give them a little rest.

Enjoy!

Cheese Grits with Fiddleheads and RampsCheese Grits with Fiddleheads and Ramps3

Cheese Grits with Fiddleheads and Ramps in Brown Butter

Yields: 4 servings

Ingredients

1 cup quick cooking grits

6 oz. Gruyère cheese, shredded

1 tablespoon lemon zest

4 sprigs of thyme

1/2 lb fiddleheads, rinsed

1 large bunch of ramps, rinsed

1 stick unsalted butter, cut into cubes

Salt

Freshly Ground Black Pepper

       Directions

  1. Follow the directions on the packaging for cooking the grits.  Once they are done, stir in the shredded cheese and 3 tablespoons of butter lemon zest, and the leaves from the thyme sprigs. Season with a little salt and pepper
  2. Place the fiddleheads in a large microwave-safe bowl and add in an inch of water.  Cover and cook in the microwave at high heat for 4 minutes.  Remove from the microwave and drain water.
  3. Set a large pan on the stove over medium-high heat.  Add the remaining butter to the pan and let it melt, whisking frequently.  Once it starts to foam, add in the ramp bulbs (not the greens) and cook in the butter for a minute or two.  At this point, the butter will begin to brown and the ramps will get some color on them.  Add in the fiddleheads and the ramp greens and cook for another 2 minutes.  Season with salt and freshly ground pepper.  
  4. Transfer the grits to plates or bowls and top with fiddleheads and ramps.  Be sure to get as much of the butter on top of the dish.

[/print_this]

Dill Pickles

I stepped into the kitchen after spending hours in front of the television.  I just couldn't take it anymore.  I needed a break.  From the fridge I pulled ingredients for dinner.  I hovered over the stove and stirred, staring into a pot of stew. My thoughts brought me back to where I was when the terrorist attacks on the World Trade Center occurred and the years it took before it felt normal to go into the City again.  I wondered if it'd be that way here in Boston; if I'd do all I could to avoid Copley Square so I wouldn't have to be reminded of what happened.  And would we see a change in people?  Maybe a bit more camaraderie and compassion?  Is it possible for us to take something out of this that will make our lives a little brighter?


Garlic Dill Pickles

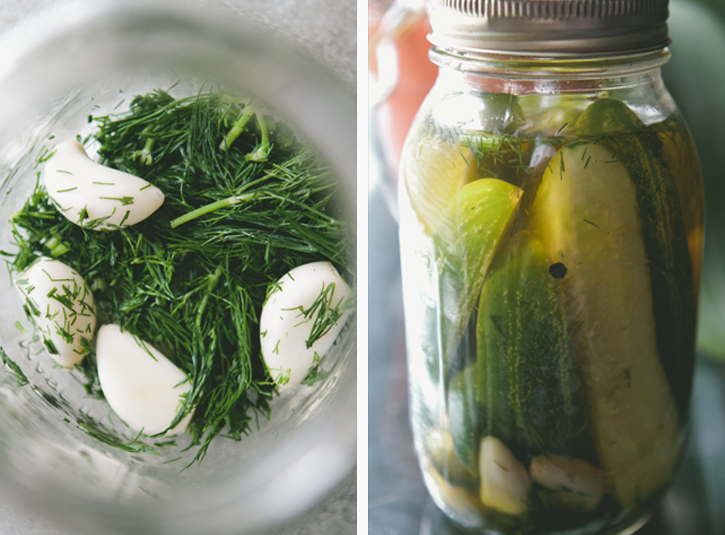
A craving for pickles led me to my favorite pickling expert, Marisa McClellan and her wonderful book (and blog of the same name) Food in Jars. I've adapted it slightly here.

Ingredients

8-10 (approx. 3 lbs) kirby cucumbers, rinse and dried 1 1/2 cups apple cider vinegar 1 1/2 cups filtered water 2 tablespoons pickling salt 6 garlic cloves, peeled and crushed fresh dill weed 2 teaspoons black peppercorns 1 teaspoon red chili flakes

Directions

1. Wash the jars in warm, soapy water.  To prepare shelf stable pickles, prepare a boiling water bath canner.  Put the canning jar lids into a small saucepan with 3 inches of water and set to a low simmer.

2. Remove blossom end of the cucumbers.  Cut into chips, spears or leave whole, depending on your preference.

3. In a saucepan, combine the vinegar, water and salt and bring to a boil.

4. Equally divide garlic cloves, a big hunk of dill weed, black peppercorns and red chili flakes between the jars.  Add the the cucumbers to the jars and pack as tightly as possible without crushing them.

5. Carefully, pour the brine into the jars, leaving 1/4 inch of room from the rim of the jar.

6. Remove air bubbles from the jars by gently tapping them.

7. Wipe the rims of the jars and apply lids and bands (don't screw them on too tightly).

8. If making shelf stable pickles, lower jars into your processing pot. When water returns to a boil, set a timer for 10 minutes.

9. When the 10 minutes is up, remove jars from canning pot and allow them to cool. When jars are cool enough to handle, check seals.

10. If you choose not to process your jars, let them cool before putting them into the refrigerator. Do note that your jars may seal during the cooling process. However, without the boiling water bath process, that doesn't mean they're shelf stable. Refrigerate them.

11. Let pickles rest for at least one week before eating.

Steamed Asparagus with Fried Eggs and Pecorino

News: Before we get into the actual post and recipe, I wanted to share that The Boys Club, the cocktail blog that I am the Managing Editor for, has been nominated in the Best Cocktail Blog category in the 2013 Saveur Food Blog Awards.  We are so thrilled and proud of all of our incredibly talented contributors.  Voting is taking place over on the Saveur site until midnight on Friday, April 19th.

While flipping through the latest Bon Appetit I was struck by a page filled with simple, single-line recipes utilizing asparagus.  These dishes, the ones that require little fuss but magically transform into beautiful, rustic plates, are why I fell in love with cooking.  This recipe for steamed asparagus topped with a fried egg and shaved parmesan (modified here by switching it out with pecorino) stood out and I immediately marked it. I sat down and treated this as a light lunch, paired with a glass of wine (nothing wrong with a little lunchtime vino).  Even though we've had some fickle weather, a meal like this reminds me of how much I look forward to summer afternoons.  The way this year has been flying by, I expect them to be here before I know it.

[print_this]

Steamed Asparagus with Fried Egg and Pecorino

Ingredients

Asparagus, washed, trimmed and steamed

Egg

Pecorino cheese, shaved

Salt and Black Pepper

Directions

Drizzle steamed asparagus with olive oil. Top with a sunny-side-up egg and shaved Pecorino; season with salt and pepper.

Tags: Vegetarian, Side Dish

[/print_this]

Garlicky Collard Greens


There have been lots of things happening here on my end, but none of it is remotely related to these recipes. So, I've been a little late in sharing.  The big news of the moment is that I'm an uncle... again. Bryn Scarlett arrived on the first day of spring, though it was a snowy one and not very spring-like.  Hopefully her arrival means that warmer and sunnier days are on their way.  What it definitely means is that I will have another little child to run around with, to tickle and hug, to feed junk food, and to teach how to cook.  I can't wait to snuggle with her and soothe her when she cries.  I'll sing to her as she falls asleep in my arms.  And when she poops, I will pass her off to her mother or father.  Oh, I just love being an uncle!

And now on to the collards.  Yeah... I'm not sure where to go with this.  There's not really a good way to transition. This came out of desperation... we were either going to cook with them or they were just going to wilt away in our produce bin.  Collard greens often get neglected in our house. I don't know what it is about them, but I've never really been a fan.  I do know what the problem is actually... I haven't cooked them properly.  In the past, I've thrown them into dishes without much thought.  They come out tough and tasteless.  But I went in wanting to give my all.

Here's a great example of how when you put a little thought and care in how you treat an ingredient, you can come out with a pretty stellar dish.  The mixture of garlic and spice make for a lively side.  And, hey, I've learned that if you blanch the greens, they come out tender.  Sadly, I'm just figuring that out now.  After all this time.  Better late than never, right?


Garlicky Collard Greens

Ingredients

3 bunches  collard greens, washed, stems removed, and cut into 1 inch strips

1/4 cup olive oil

4 garlic cloves, sliced thinly

Salt and pepper

Red pepper flakes, optional

2 cups cooked rice, optional

Directions

1. Bring 1 quart of salted water to a boil in a pot.  Add the collard greens and cook for 10 minutes, stirring occasionally.  Drain greens in a colander.

2. Heat the olive oil in a large sauté pan on medium-high heat.  Add the garlic and cook for a minute, making sure to stir it continuously.

3. Add the collard greens, season with salt and pepper, and cook for an additional 3 minutes, or until the greens have wilted.

4. Transfer to a platter and season with red pepper flakes.  Serve with rice.


Leek Salad with Grilled Haloumi and Triticale Berries

Triticale Berries 14

The conversation started so many months ago.  I can't even remember exactly when.  September maybe?  Maria and I met for coffee (ok, it was cocktails) after having connected through Twitter. We chatted about our various projects and backgrounds, but, really, we connected over our mutual love for food.  At the time of our meeting, I had yet to get my hands on her book Ancient Grains for Modern Meals, but the word around town was that the book was amazing.  When I told her I hadn't checked it out, she generously offered to send two copies (one for me and one for a giveaway).  When the books came in the mail, I plopped down on the couch and began flipping through.  Every single recipe looked right up my alley.  Loads of healthy, vegetarian dishes.  But some of the ingredients, well, I was a little nervous I'd get my hands on them.

And then, magically, in my CSA box, we received a bag of locally harvested triticale berries (a hybrid of wheat and rye).  I had NO idea what I was supposed to do with them, so I sent Maria a message and asked her if there was a way to include them in one of her dishes.  She directed me to her leek salad ("This recipe combines both of the cultures I was raised in, Germany and Greece: rye is widely used in Northern Europe while all the flavors of the salad are Mediterranean, orange, fennel, sun-dried tomatoes, herbs, and haloumi.") and I was sold.  I'd make it that week.

But then I didn't... not that week nor the next week or month (well, four months) after.  Until I got around to it last week... finally. Better late than never, right?

I've adapted the recipe slightly, removing the capers and adding in some marinated artichokes and I decided a little chopped up orange peel would add some brightness (I've come to terms with my obsession with citrus zest), but, really, the credit goes to Maria for building such a satisfying vegetarian dish.

Oh, and I do have a copy of Ancient Grains to giveaway.  You won't be disappointed.  It's chock-full of information about grains... where they come from, how to cook them, and what to do with them.

TO ENTER THE GIVEAWAY: Leave a comment on this post

For additional entries: Share this post on Pinterest, Twitter, and/or Facebook and leave a comment telling us you’ve done each one.

Official Rules: This is open to US/Canadian residents only.  No purchase necessary.   Giveaway will end on March 18th 2013 at 12:00 pm EST. One winner with a valid entry will be selected at random using random.org. The winner will be notified by email and will have 48 hours to claim their prize or another winner will be selected.


Leek Salad with Sun-Dried Tomatoes, Artichokes

and Triticale Berries

(Slightly adapted from Maria Speck's Ancient Grains for Modern Meals)

Ingredients

1 1/2 cups water

3/4 cup triticale berries or rye berries, soaked overnight and drained

---

2 medium leks, cleaned and cut into 3/4 inch segments (about 4 cups

1/2 cup vegetable broth

1 (2- by 1-inch) strip orange zest, white pith removed

1/4 cup chopped oil-packed sun-dried tomatoes, drained, 2 teaspoons oil reserved

1/2 cup marinated artichoke hearts, quartered

1/4 cup chopped fresh mint, plus 2 tablespoons for garnish

3/4 teaspoon fennel seeds

1/4 teaspoon fine sea salt

1/4 teaspoon freshly ground black pepper

---

1/4 pound haloumi cheese

1 1/2 teaspoons dried crumbled oregano

1/4 teaspoon freshly ground black pepper

1/8 teaspoon dried red pepper flakes

Directions

1. Prepare the triticale berries by placing the water and berries in a saucepan and bringing it to a boil.  Reduce the heat to a simmer, cover, and cook for 50 minutes.  Remove from heat and let sit for 10 minutes.  Drain any leftover liquid and transfer to a serving bowl to let cool.

2. To prepare the salad, bring the leeks, veggie broth and orange zest to a boil in a saucepan.  Reduce heat to a simmer, cover the pot, and cook until the leeks are soft 5 to 7 minutes.  Remove the orange peel and set aside.  Drain the leeks and add them to the bowl with the triticale berries.  Chop the orange peel into thin strips and add it to the bowl, along with the sun-dried tomatoes, marinated artichoke hearts, 1/4 cup mint, fennel seeds, sea salt, and black pepper.

3. Position an oven rack about 6 inches below the heat source and preheat the broiler.  Cut the haloumi cheese into thin slices, about 1/4 inch thick.  Rub each piece with the sun-dried tomato oil and sprinkle with the oregano, black pepper, and red pepper flakes.  Make sure both sides are coated with the oil and spices.

4. Transfer the cheese to a broiler pan and broil the haloumi until the slices begin to brown at the edges, approximately 5 minutes, turning once half way through with a spatula.  Keep an eye on the cheese as you do not want it to dry out.

5. Transfer the triticale salad to a platter and top with haloumi.  Sprinkle the remaining 2 tablespoons of mint on top and serve.

Reprinted with permission from Ancient Grains for Modern Meals by Maria Speck, copyright © 2011. Published by Ten Speed Press, a division of Random House, Inc.

Marinated Eggplant with Mint and Capers

MarinatedEggplant2MarinatedEggplantDuo

At the beginning of the year, when I sat down to think about the direction I wanted to take this site, I decided on a few things.  One, I didn't want to stress about it anymore. I've cut back on the number of posts.  I think this will allow me to focus on creating quality content rather than trying to bang out material for the sake of putting it up here.  And I think it will allow me to focus on the other things in my life, like relationships and exercise (still working on that one) and getting out a bit more to enjoy all the culture this city has to offer.

The second thing I decided was that I wanted to get back to the roots of why I started A Thought For Food.  As a home cook, I created this site as a way to share recipes that I have come to love... and to hopefully inspire a few people along the way to try dishes they wouldn't have normally made.  I always want these recipes, whether my own creations or from the vast collection coming from my always growing magazine collection, to be accessible to the masses. For me, there's nothing better than a meal that's not only flavorful, but uncomplicated.

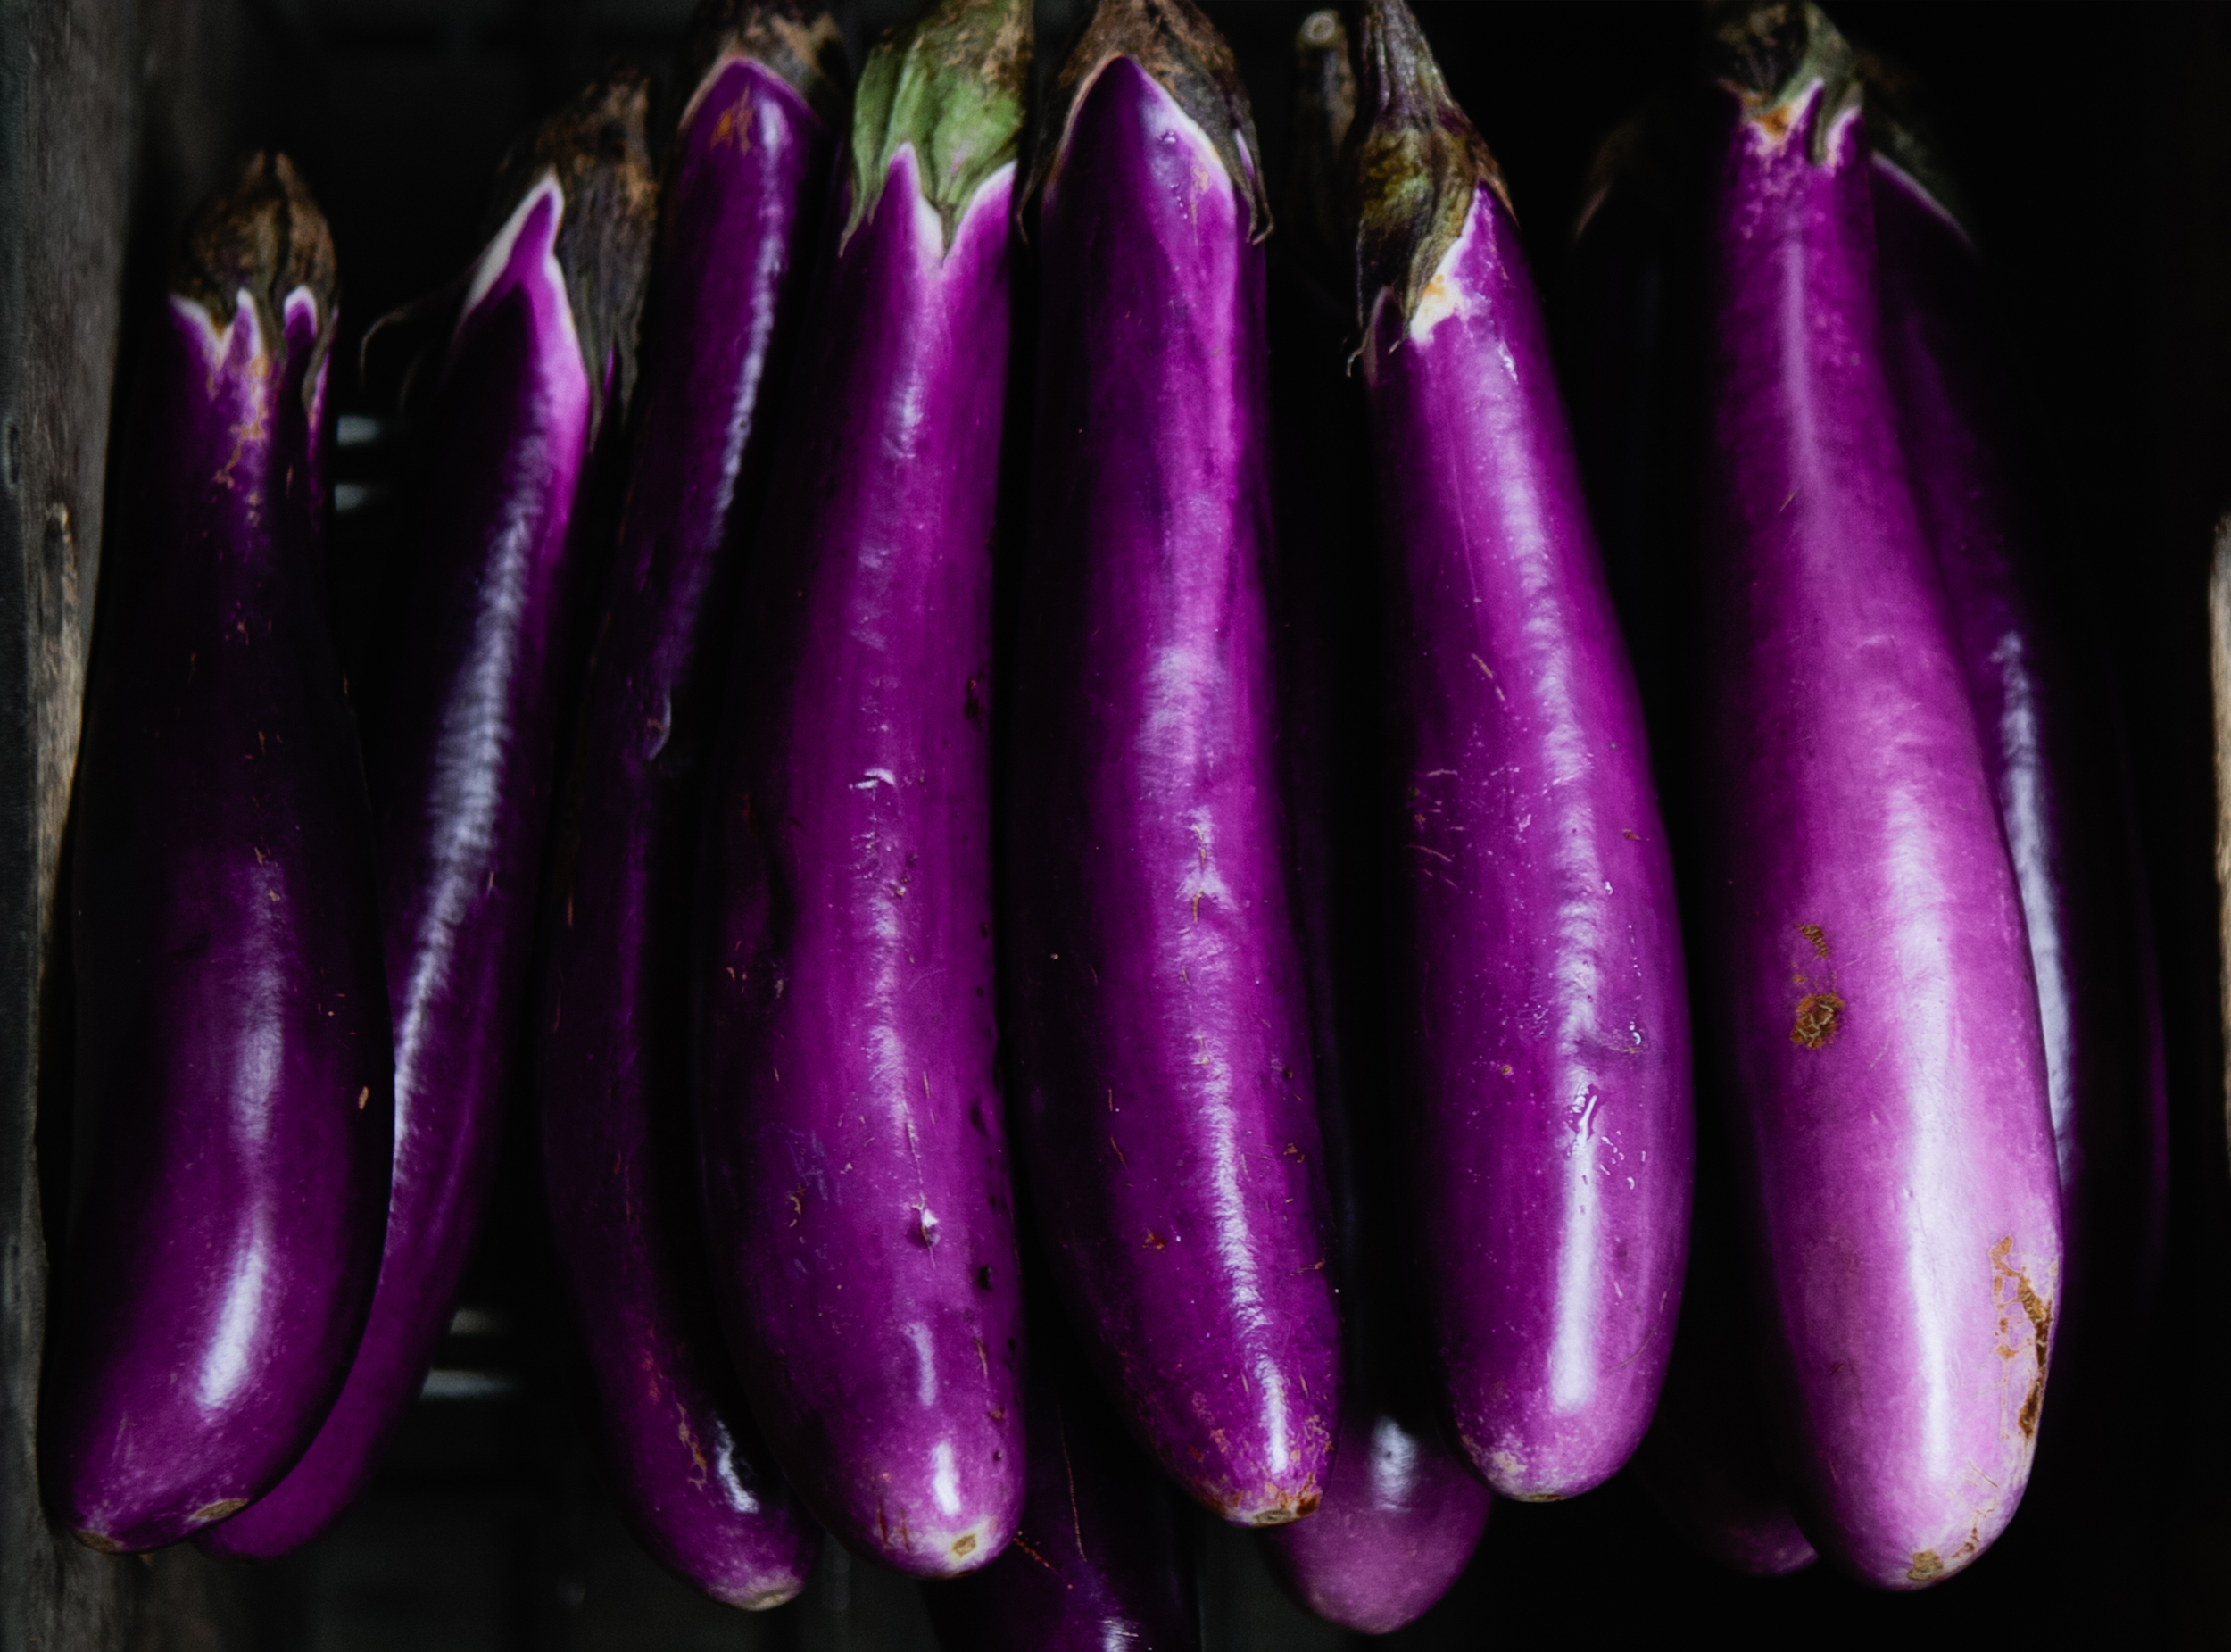
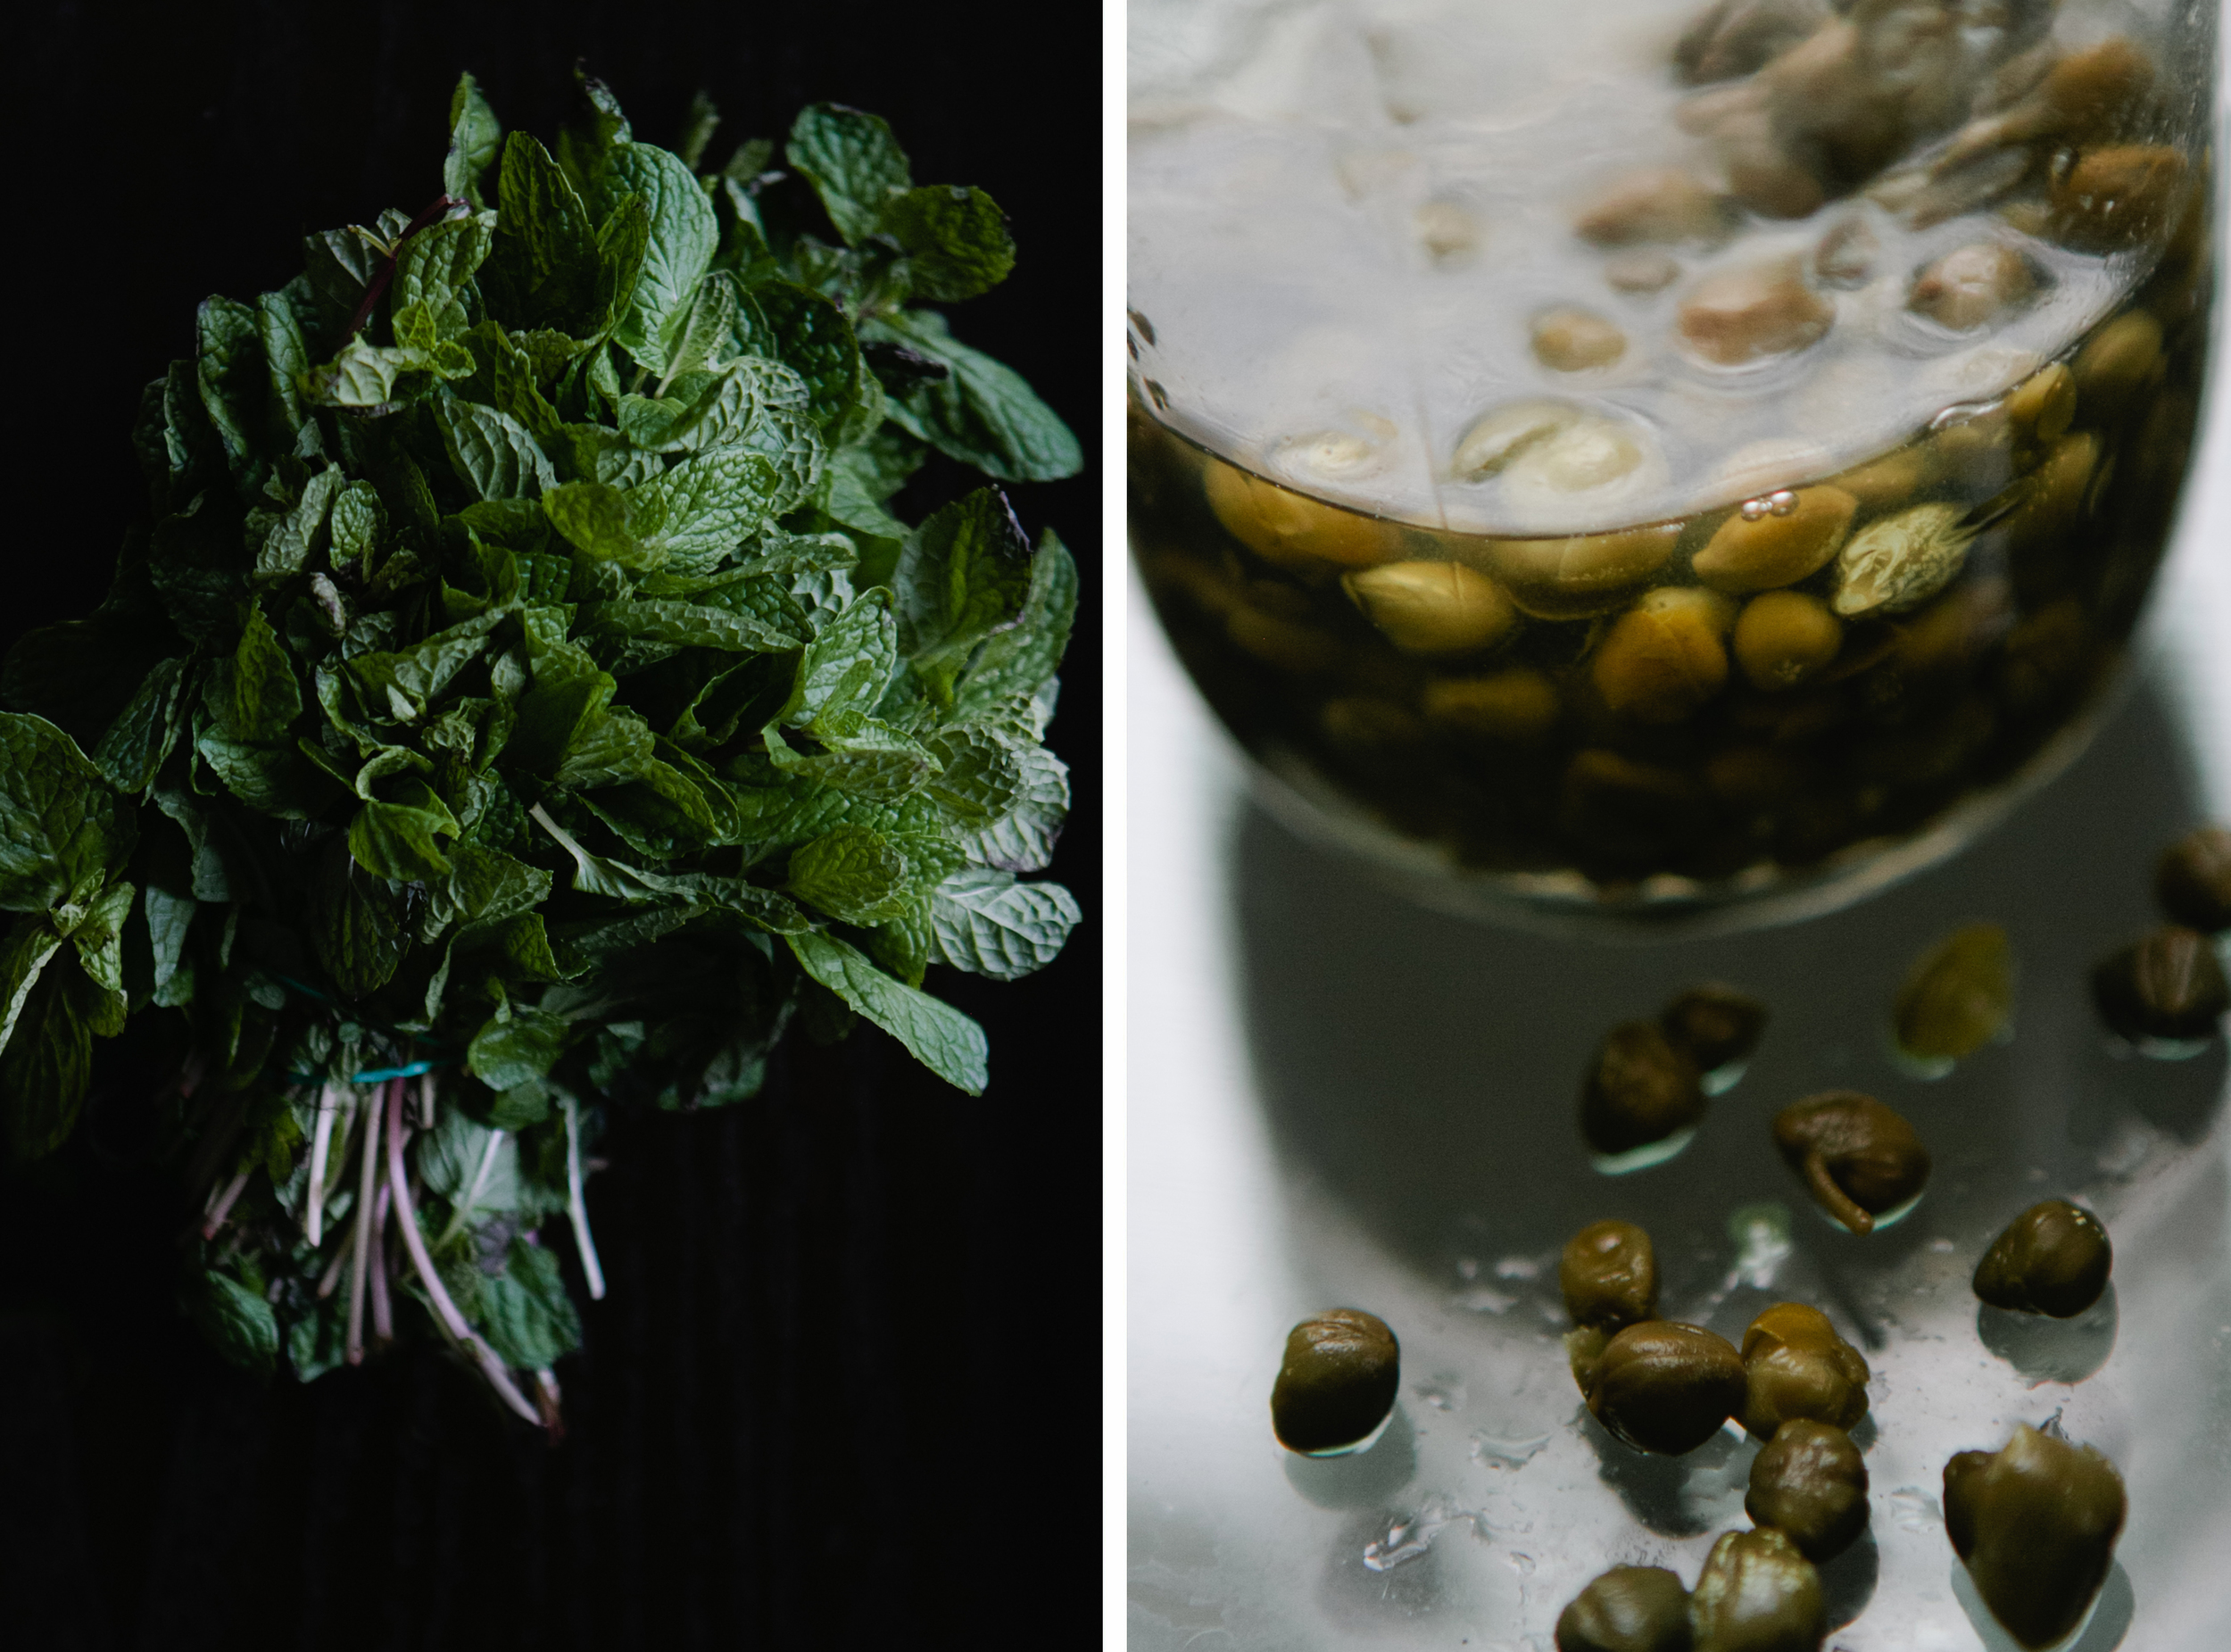
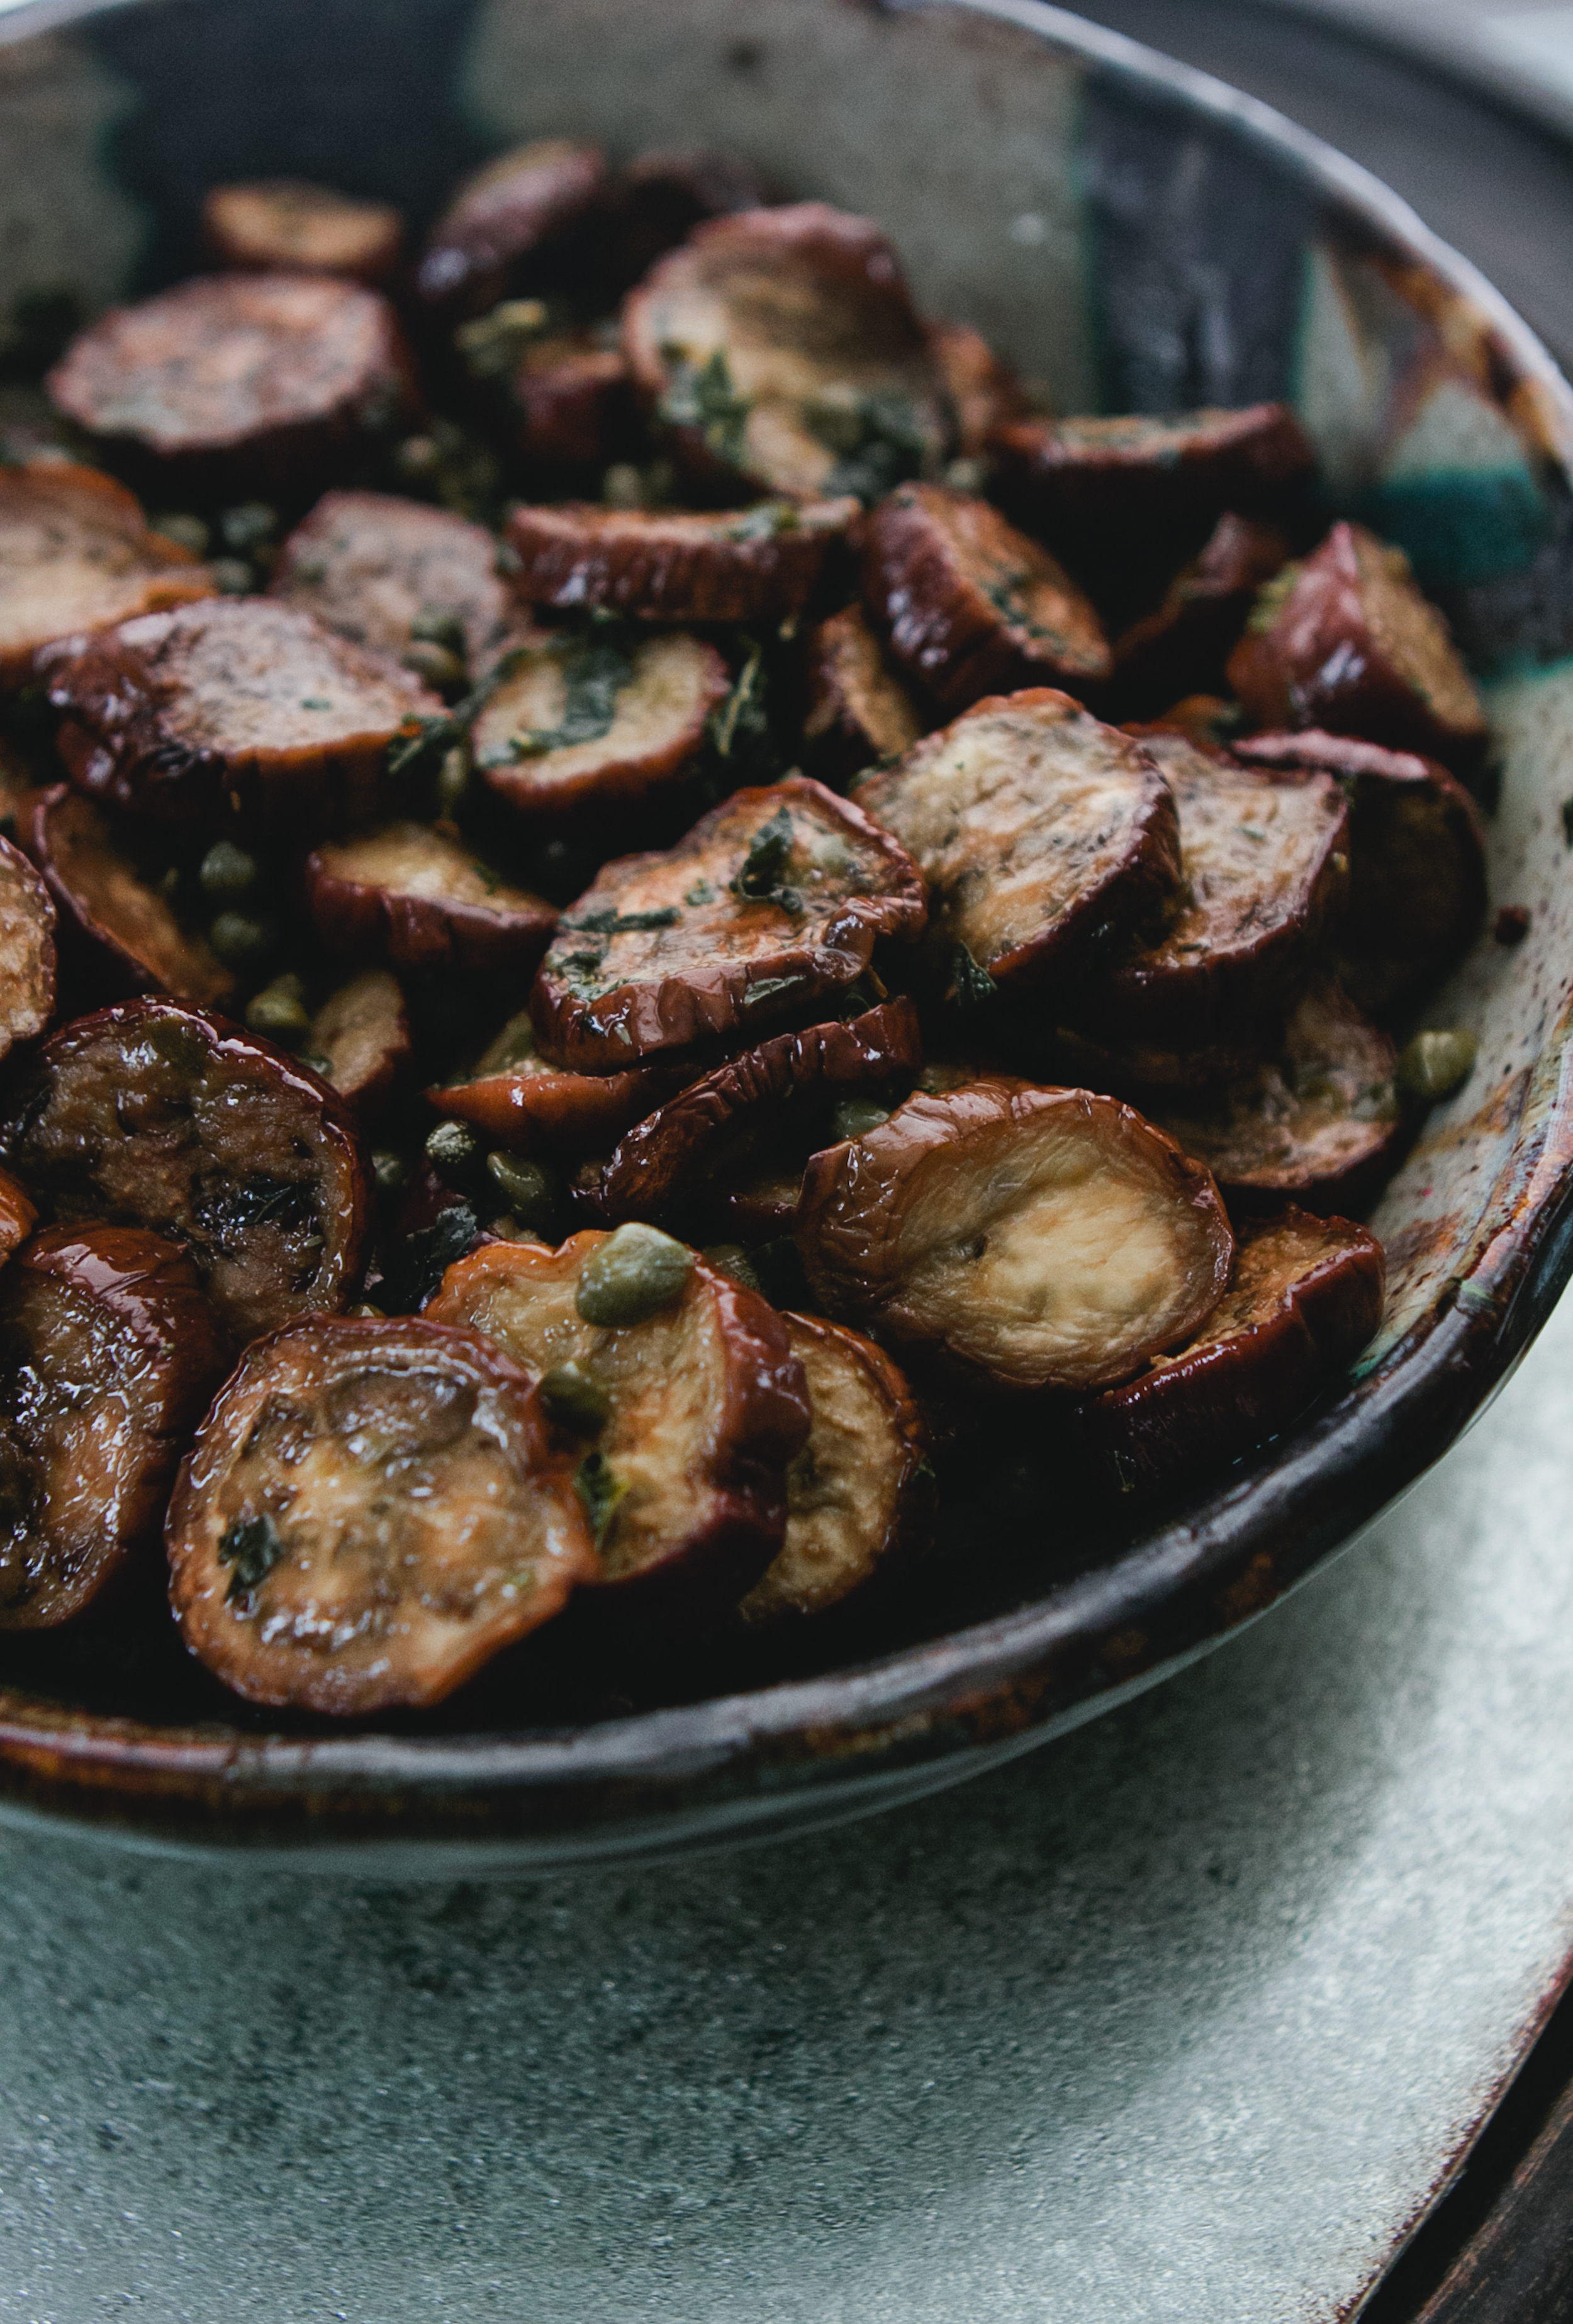
This marinated eggplant is one of those dishes that I can't get enough of.  I've been making it for years, which is why I'm kind of surprised it's taken me this long to put it up.  I recently prepared it for our annual winter BBQ, where we served up lamb kabobs and falafel, along with an assortment of middle-eastern inspired sides. The briny capers help to balance the richness of the eggplant, and the mint adds a brightness that almost makes you forget about the snow laden streets.

IMG_3880

Marinated Eggplant with Mint and Capers

Slightly adapted from Gourmet Magazine via Epicurious

Yields: 8 appetizer portions

Ingredients

2 pounds thin Italian or Asian eggplants, cut into 1/4-inch-thick rounds

10 tablespoons extra-virgin olive oil, divided

4 tablespoons red-wine vinegar

1/2 cup chopped mint

4 tablespoons small capers, rinsed

Directions

1. Preheat broiler.

2. Line a baking sheet with parchment paper.  Arrange eggplant in a single layer.

3. Brush both sides of the eggplant slices with 4 tablespoons of the olive oil.  Broil about 4 inches from the heat, turning once, until golden, 8 to 12 minutes total.

4. Stir together vinegar, mint, capers, 1/2 teaspoon salt, 1 teaspoon pepper, and remaining oil and toss with warm eggplant. Marinate at least 20 minutes.

*Can be made 1 day ahead and refrigerated. Bring to room temperature before serving.


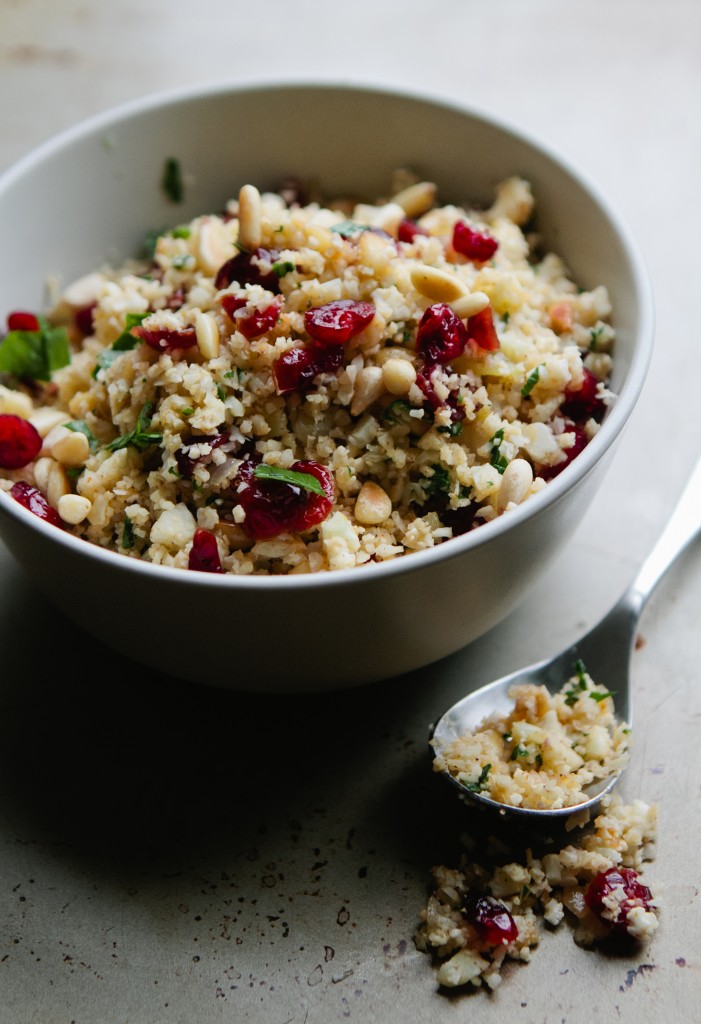
Cauliflower "Couscous"

Am I the only one who spends a lot of time thinking when they're in the shower?  Often I just stand there, singing along to songs on the radio, pondering the day's activities.  And when I'm gearing up to work on a recipe, it's during this time that my best ideas emerge.

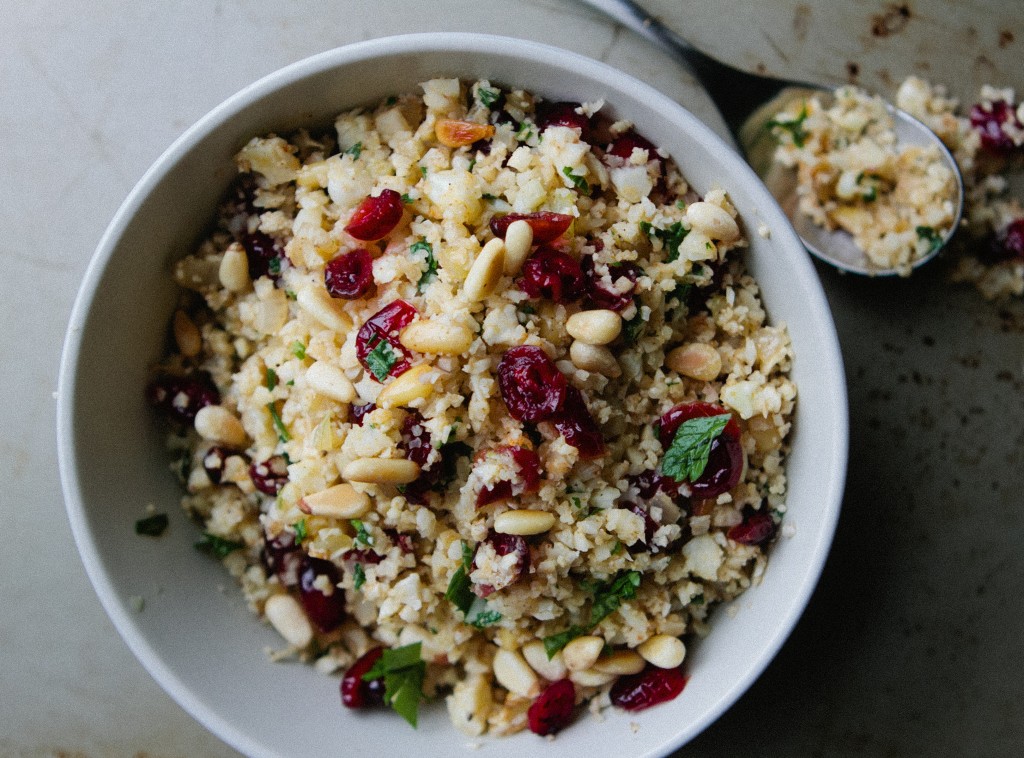
I'm probably not the first person to come up with cauliflower "couscous" but when it popped into my brain, well, I must admit that I gave myself a pat on the back.  I know... I know. Show a little modesty, Brian. But, hey, I was proud of myself.  It's not often that one of my crazy concepts actually works, so when it not only met my expectations, but exceeded them, I was beyond giddy.

Just to clarify, this is not actually couscous, but a gluten-free substitute made from cauliflower.  That's why I put the quotation marks in the title... in case you were wondering.

On a separate note, I realized that I completely forgot to share this post I did for the Kinfolk Magazine online journal on the Siena Farms South End store.  Head on over to the Kinfolk site to check it out.


Cauliflower "Couscous"

serves 4 as side dish

Ingredients

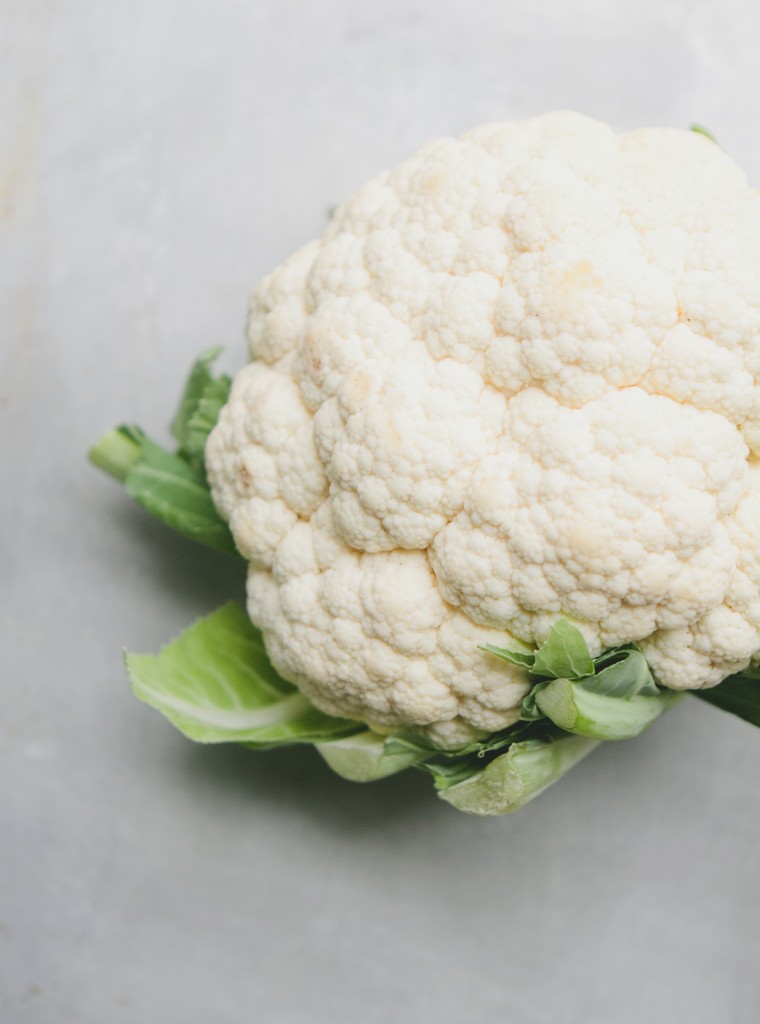
1 large head of cauliflower

2 tablespoons olive oil

1 yellow onion, chopped

2 garlic cloves, minced

2 tablespoons fresh parsley, chopped

1/2 cup dried cranberries

1/4 cup pine nuts

1 teaspoon cumin

1/2 teaspoon paprika

1/2 teaspoon cayenne pepper

Salt and black pepper, to taste

---

Special Tools

Food processor

Directions

1. Break the florets away from the rest of the head of cauliflower, making sure to leave behind as much of the stem as possible.  Chop the florets into smaller pieces and then transfer to a food processor and pulse until the pieces until they are finally chopped and resemble couscous.

2. Place the dried cranberries in a bowl and pour warm water over them to plump them up.  Let sit for 15 minutes.

3. In a small saute pan, heat the olive oil on medium heat.  Add the onion and cook for 3 minutes, or until onion is translucent.  Add garlic and season with salt and pepper, and, stirring often, cook for another minute.

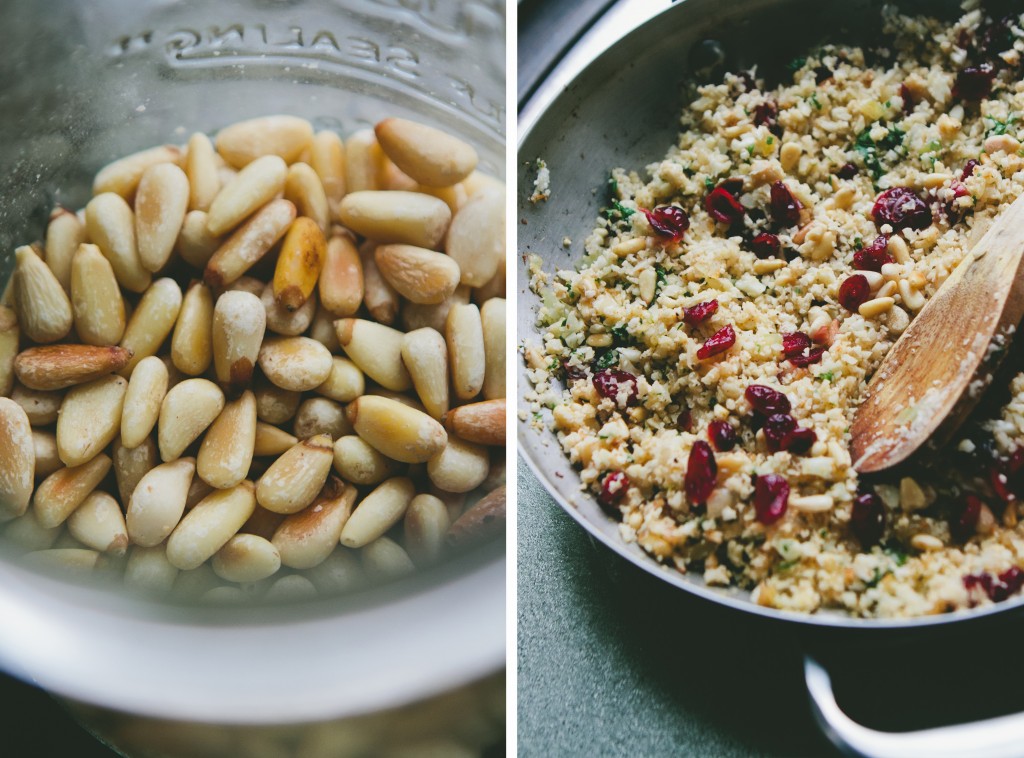
4. Add the cauliflower couscous to the pan, season with cumin, paprika, cayenne pepper, and additional salt and black pepper.  Cook for another 3-4 minutes.

5. In a separate skillet, toast the pine nuts over medium-low heat.  Make sure to shake the pan frequently to ensure they toast evenly and don't burn (note: watch them carefully as they can quickly go from perfectly toasted to burnt).

6. Drain the bowl of cranberries and add them, along with the toasted pine nuts and chopped parsley, to the couscous mixture. Taste for seasoning and, if necessary, add salt and pepper.


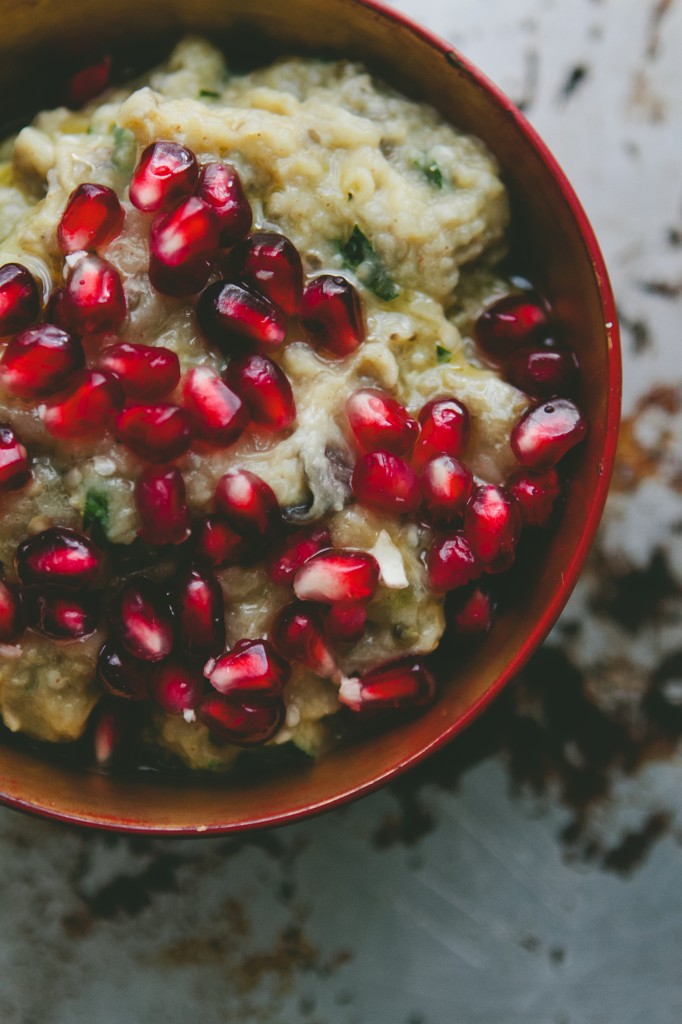
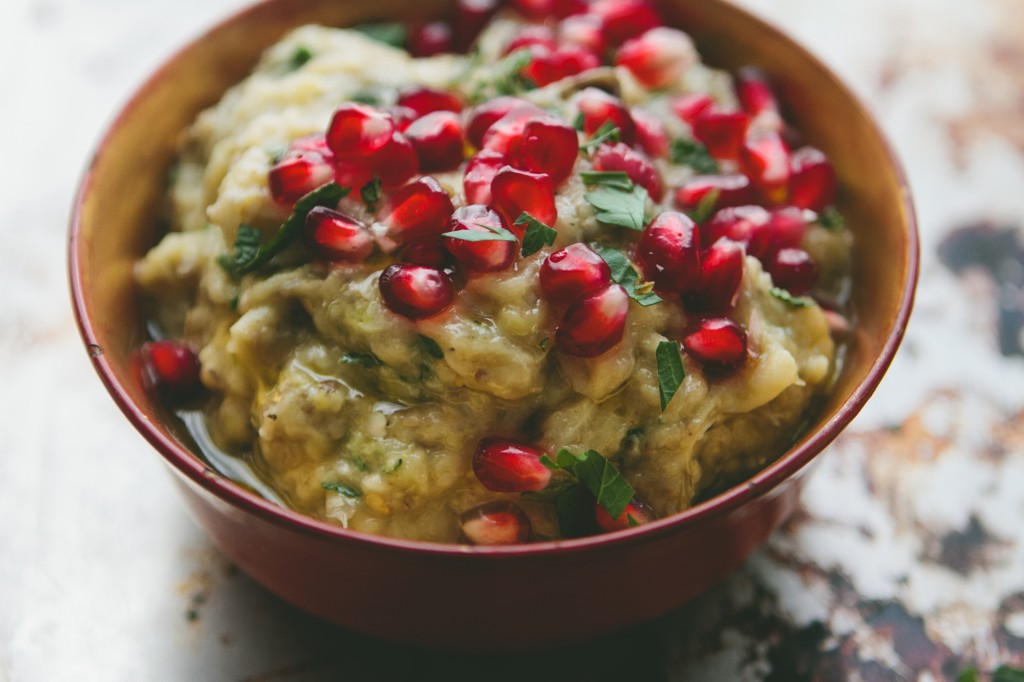
Burnt Eggplant with Lemon, Garlic and Pomegranate Seeds

Here's the truth: I don't like using cookbooks.  This doesn't mean that I don't enjoy reading them (I definitely do) or look at the pictures (I study each one for an inordinate amount of time) or that I'm not inspired by them.  I just don't like cooking from them.  The first problem is that I'm TERRIBLE at following directions.  I have the worst memory in the world when it comes to measurements, so I have to go back to read the ingredient list at least four times before I get it straight.  And then I have to follow the directions... yeah right. That's not going to happen.  By the point that I realize that maybe I should go peek at the instructions, I've already chopped and mixed everything... and sometimes it's already made it's way into the oven or onto the table.

So, when I decided that I was actually going to make something from my newly acquired copy of Jerusalem (which, I can not emphasize enough... you. must. buy. it. now. You won't regret it), I made my greatest effort to follow every direction carefully.  Between you and me, I failed at that... but it didn't matter, this is one of those recipes that's hard to screw up.

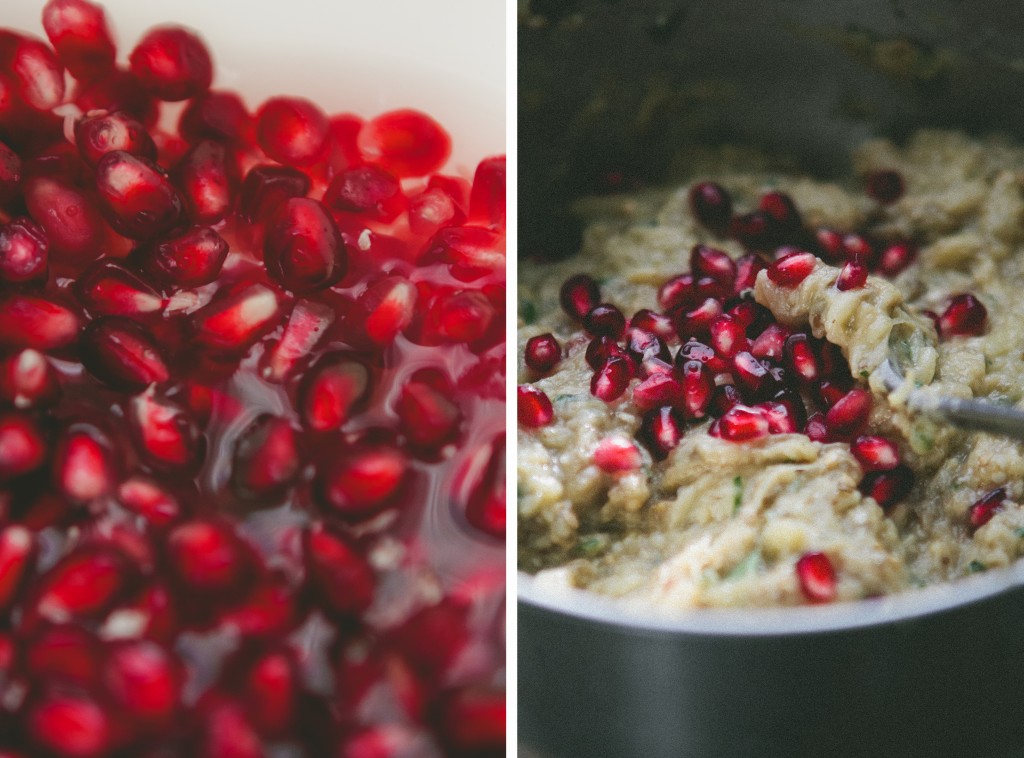
I must admit that I got some strange looks.  Pomegranate and eggplant?  Together?  Really?  That's... ummmm... unique.  But, believe me, it works.  Just be prepared for some surprised faces when they bite into their first seed.  It's priceless.


Burnt Eggplant with Garlic, Lemon and Pomegranate Seeds

(adapted from Jerusalem by Yotam Ottolenghi and Sami Tamimi)

serves 4 as an appetizer

Ingredients

4 large eggplants

3 cloves garlic, minced

grated zest of 1 lemon and 2 tbsp freshly squeezed lemon juice

4 tbsp olive oil

1 tbsp tahini

2 tbsp chopped flat-leaf parsley

2 tbsp chopped mint

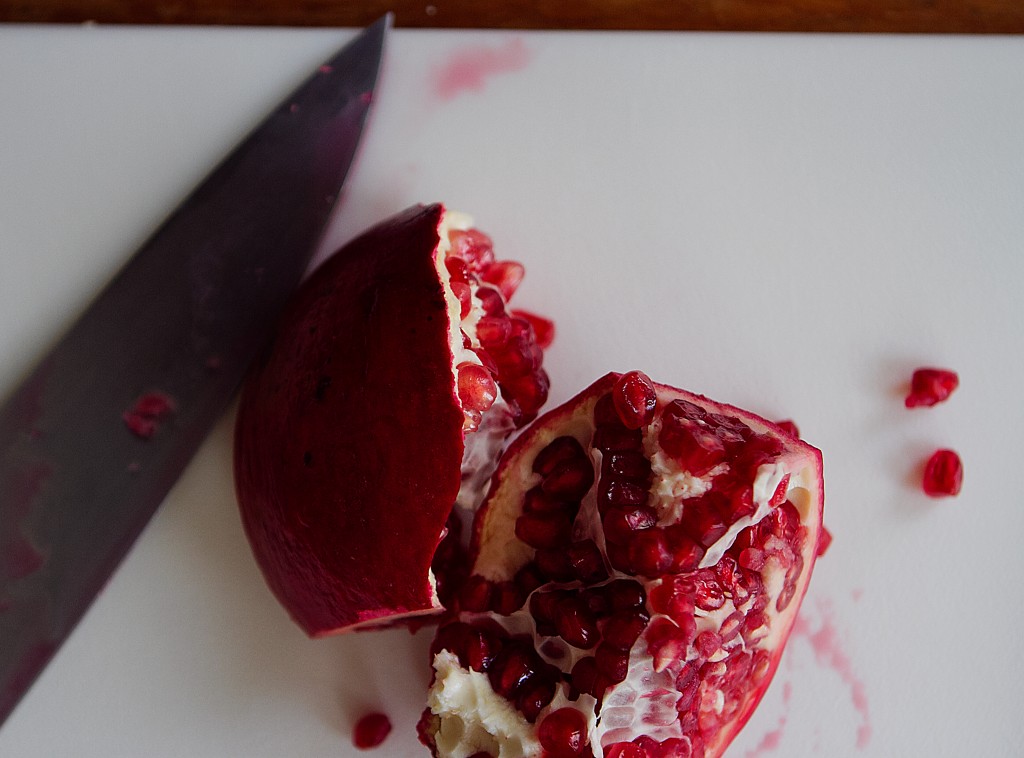
seeds of 1/2 large pomegranate

1 tsp smoked paprika

salt and freshly ground black pepper, to taste

Directions

1. Preheat the oven to 500 degrees.  Line a large baking pan (or two, if necessary) with aluminum foil.

2. Using a sharp pairing knife, make deep gashes throughout the eggplant.  Place the eggplants on the baking pans.

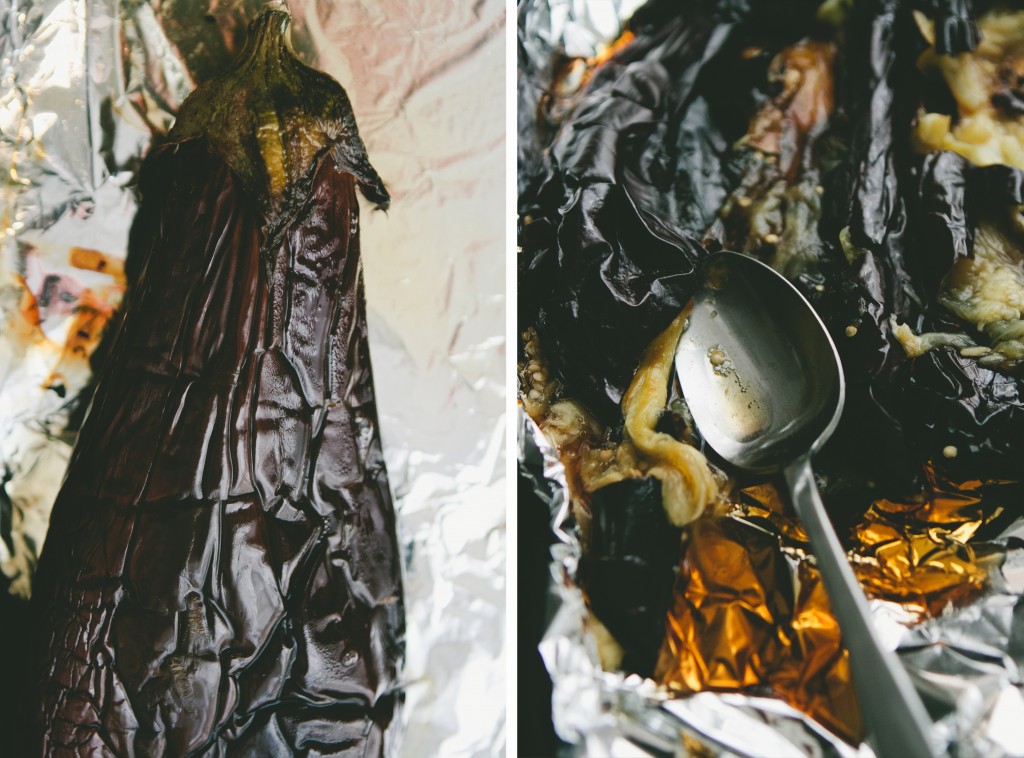
3. Roast in the oven for an hour (rotating every 20 minutes) or until the eggplant skin has burnt evenly throughout.

4. Remove the eggplant and let cool.  Once it is cool enough to handle, peel away the skin and, using a spoon, scoop out the flesh of the eggplant, transporting to a mixing bowl.

5. Place eggplant into a colander and let sit for at least an hour, or until it has drained most of its liquid.  Once this is done, transfer back to the mixing bowl.

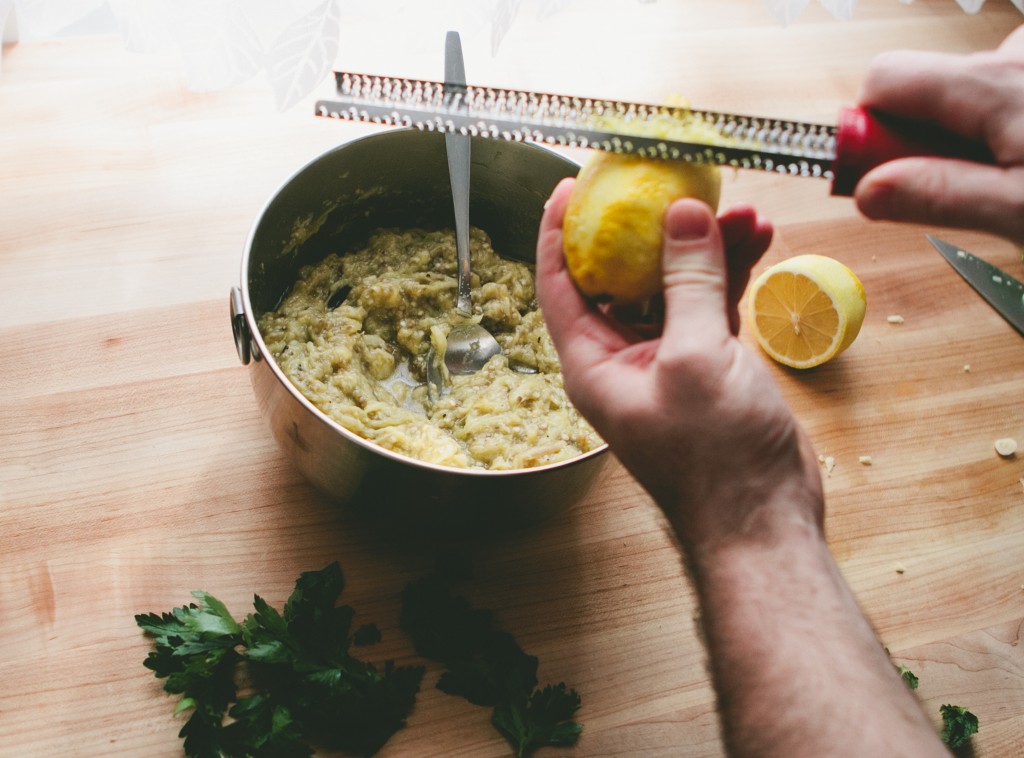
6. Mash the eggplant with a fork.  Mix in the garlic, lemon zest and juice.  Stir in the olive oil and tahini.  Refrigerate for 30-40 minutes to let it develop its flavor.

7. Remove from the refrigerator.  Mix in 3/4 of the parsley, 3/4 of the mint, and 3/4 of the pomegranate seeds.  Season with smoked paprika, salt and freshly ground pepper.

8. Garnish with remaining pomegranate seeds, mint, parsley, and a drizzle of olive oil.  Serve with pita bread.


Quinoa with Acorn Squash and Pomegranate

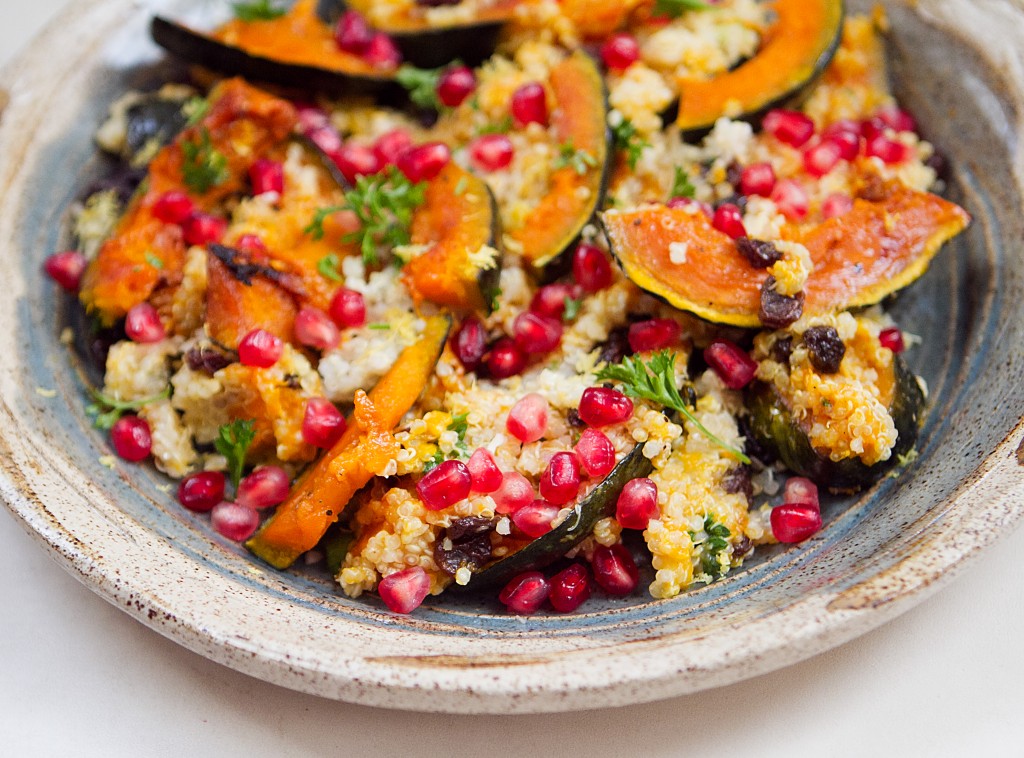
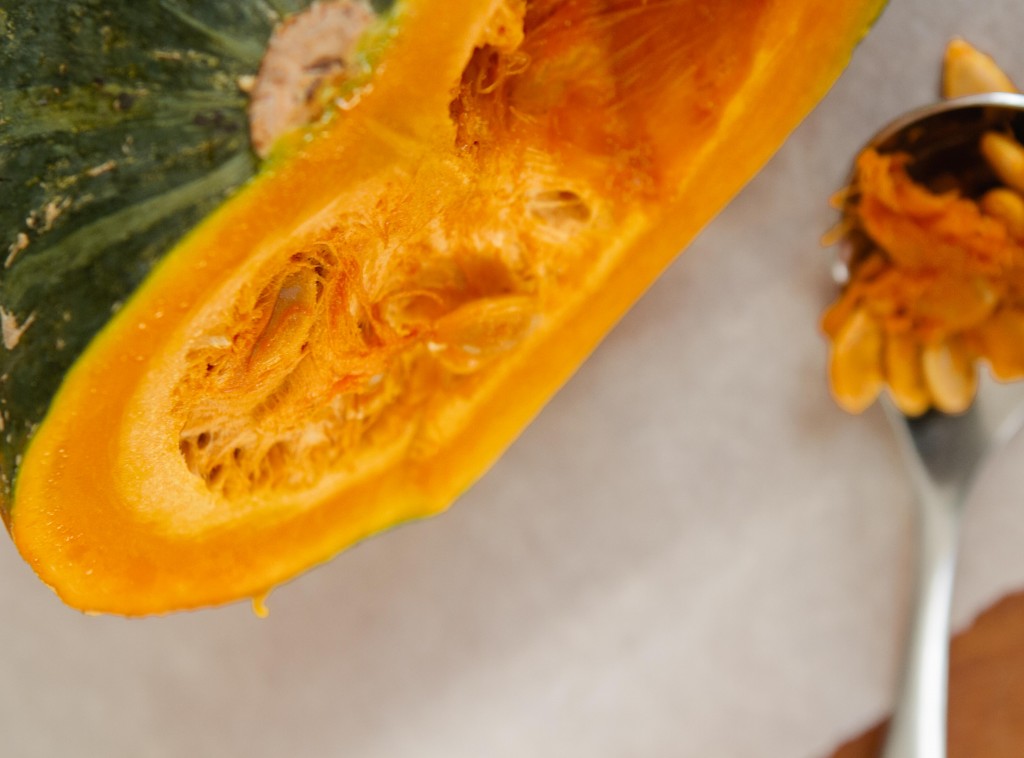
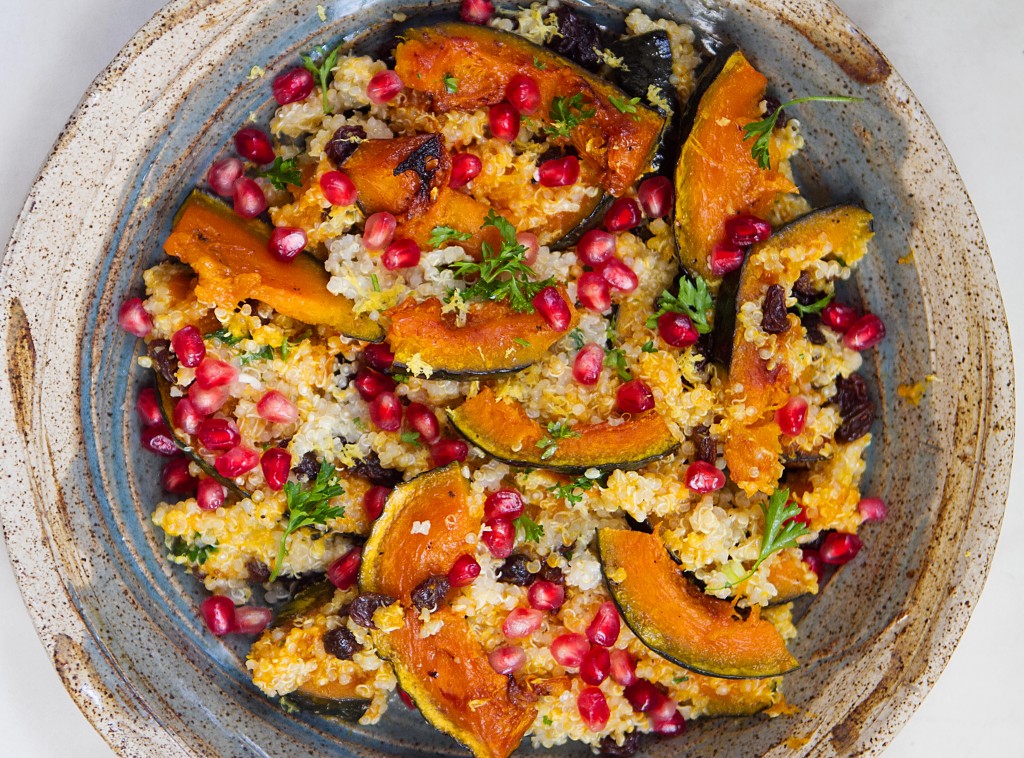
I'd call this dish a happy accident.  Here's the short version of a long story.  There were plans to roast a whole eight pound fish at our Friendsgiving dinner a few weeks ago.  Why?  Well, I don't know.  I wanted to... it sounded like fun.  Do I need a reason?  I'm crazy!  We were very close to actually doing it and then someone (cough, cough --- Eric --- cough) decided they'd be practical and bring up that maybe we didn't have enough space in our oven to roast a whole fish.  Now, I was under a lot of stress at the time and I COULD have freaked out (I've been known to throw tantrums in the midst of party planning).  But I didn't.  I kept my cool and said, "Ok, darling husband, now I need to think of something to make for those that don't eat meat."  I took a deep breath, looked at the ingredients on hand, and came up with this quinoa dish.

So, I guess I have Eric to thank for this creation.... thanks for poopooing on on my dreams of roasting a whole fish.  Without you, I wouldn't have created this fabulous recipe.

Quinoa with Acorn Squash and Pomegranate

Serves 4 as an entree, 6 as a side

Ingredients

3/4 cup of quinoa, cooked

1 acorn or kabocha squash

3/4 cup pomegranate seeds

1/4 cup raisins

2 teaspoons minced fresh parsley

2 scallions, green parts only, chopped

1/4 cup olive oil, plus more for roasting squash

2 tablespoons lemon juice

Zest of half a lemon

Salt and pepper

Directions

1. Preheat oven to 400 degrees.  Line a baking sheet with aluminum foil.

2. With a sharp knife, cut the top and bottom off the squash.  Cut the acorn squash in half lengthwise and, using a spoon, scoop out the seeds.  Cut each piece in half again lengthwise.  Then slice each quarter lengthwise, creating 1/2 inch slices.  Place squash slices into a bowl and drizzle with olive oil and a sprinkle of salt.  Spread across the pan and arrange so each piece sits flat. Roast in the oven for 25 minutes.

3. Meanwhile, make the dressing by whisking together the 1/4 cup of olive oil, the lemon juice, lemon zest, parsley, and scallions.  Season with salt and pepper, to taste.

4. Once the acorn squash is finished, remove from the oven and let cool for a few minutes.

5. Mix together the cooked quinoa, pomegranate seeds, raisins, and dressing in a big serving bowl.  Season with salt and pepper, to taste.

6. Top with roasted squash pieces and enjoy!


Leek Fritters and a Smitten Kitchen Cookbook Giveaway

May 2009. It's a month before our wedding and I'm struggling to figure out what to serve to our vegan guests.  The current menu is full of decadent carnivorous dishes: lobster and clams, bacon wrapped scallops and miniature crab cakes.  A platter of grilled veggies for our vegan friends feels like a cop out... so I gather every resource I have (cookbooks, magazines, blogs) and scour each for ideas.  After hours of searching, I come up empty.

Desperate, I send an e-mail to a blogger whose site I've been reading for a while.  Her recipes have always been delightful and I think, "Heck, maybe she has some ideas".  Within an hour, a response flutters into my mailbox... and it's loaded with suggestions. We go back and forth a bit, and, soon, she has guided me to a recipe for bulgar salad stuffed peppers (which, ultimately, gets raves from our guests).  If I hadn't felt a bond to her already, this sure solidified things.

I'm not sure if Deb remembers this interaction (I have no doubt that she gets a number of inquiries each day), but it's one that I will never forget.  I had the pleasure of meeting her in person in July at the Big Summer Potluck and we got to have some nice little chats over the course of the weekend.

Like most home cooks, I've been anticipating the release of her book for quite some time (how long has it been? It feels like she announced it eons ago).  Well folks... The Smitten Kitchen Cookbook is finally here and it is just as magnificent as you would expect from something created by Deb.  As soon as it arrived the other night, I marked the pages of every recipe I want to make (ok... maybe not every, because my copy would be full of Post It notes).  I am a sucker for rugelach, so I can't wait to dig into her Chocolate Raspberry Rugelach.  And the Vermouth Mussels with Oven Fries is totally calling my name.  I know Eric won't mind if I spend the next few months cooking all of these.  Right, Eric?

Since I have no patience, I immediately got to work and whipped up these leek fritters. They're served with a garlic and lemon sour cream sauce that is just magical.  After I took pictures, I promptly devoured them (making me feel slightly guilty).  They were wonderful and I'm planning on adding them to my Thanksgiving menu.

Ok... so, now that I've gone on and on, here's some fun news:  The publishers of the book have very generously provided a copy for me to giveaway!  Yup! That's right!  You could have your very own copy of The Smitten Kitchen Cookbook (you can also purchase it, of course, though I know it's always fun to win things). Oh, and since I'll hopefully be seeing Deb when she comes to Boston, I will try to get it signed too.

Unlike most giveaways I do here, I'm going to open this up to everyone (not just US/Canadian residents)! Woo hoo!

TO ENTER: Leave a comment on this post

For additional entries: share on Pinterest, Twitter, and/or Facebook and leave a comment telling us you've done each one.

Official Rules: This is a worldwide giveaway.  No purchase necessary.   Giveaway will end on November 16th 2012 at 12:00 pm EST. One winner with a valid entry will be selected at random using random.org. The winner will be notified by email and will have 48 hours to claim their prize or another winner will be selected. 

Leek Fritters

(adapted from Deb Perelman's The Smitten Kitchen Cookbook)

yields approximately 10, 2 1/2 inch round fritters.

Ingredients for the Pancakes

4 large leeks, pale green and white parts only

2 scallions, trimmed, halved lengthwise and thinly sliced

1/4 cup all-purpose flour

1 teaspoon baking powder

Freshly ground black pepper

1/2 teaspoon powdered ginger

Pinch of cayenne

1 egg

2 tablespoons olive oil or vegetable oil, for frying

---

Ingredients for the Lemon and Garlic Sour Cream

1/2 cup sour cream

1 garlic clove, minced

1 tablespoon freshly squeezed lemon juice

Pinch freshly grated lemon zest

Salt

Directions

1.  Fill a bowl with cold water.  Cut the leeks in half lengthwise and plunge them in the water, fanning the layers to get rid of any grit.  Once they are clean, cut crosswise into 1/4-inch strips.

2.  Bring a pot of salted water to a boil and cook the leeks for 3 to 4 minutes, until they are softened but not limp.  

3. While they are cooking, whisk together the flour, baking powder, a few grinds of black pepper, ginger, and cayenne.

4.  Drain the leeks and dry in a towel or cheesecloth.  Make sure to get rid of as much water as possible.

5.  Transfer the leeks to a large mixing bowl and add scallions.  Add the flour mixture to the leeks and toss to coat.  Add the egg and stir until it is incorporated with the mixture.

6.  Line a baking sheet with aluminum foil and place in the oven.  Heat the oven to 200 degrees.

7.  In a large skillet, heat the oil over medium heat until it begins to shimmer.  Scoop heaping tablespoons of the batter into the skillet (I made 3 fritters at a time).  Using a spatula, gently flatten the fritter. Cook for approximately 3 minutes, or until it is golden brown.  If they are cooking too quickly, lower the heat.  Flip fritters and cook until the other side is golden.  Drain on paper towels and transfer to oven.

8. Repeat with remaining batter.

9. While they are in the oven, make the sour cream by whisking together all the ingredients and seasoning with a little salt.

10. Serve fritters immediately and top with a dollop of sour cream and a little additional lemon zest.
 

Moroccan Carrot Dip + Hurricane Sandy Relief Efforts

This has been an odd week. Each day seems to have merged into one big blob. Maybe it's due to the way it started off... with a storm that ravaged the state where I grew up and a city for which I hold much affection for.   My parents and sister and her family are safe, though they're stuck without electricity until next week (not to mention a very large tree that is leaning precariously towards their house).  But there are others who weren't as lucky... so many people lost their homes and possessions.  And there are neighborhoods that will need to be completely rebuilt.  It's devastating to watch.

One thing I realized I can do is reach out to you, my dear readers, and ask you to donate some money (even $5) to one of the amazing organizations out there who have been helping during this crisis.  The largest is the Red Cross and here is the direct link to donate to them, but there are plenty of other groups who need the money as well.  Again, even a small donation helps.  I also recommend reading this article from the Huffington Post on Tips for Donating Smartly as well as this page on the FEMA website.

Lastly, my friend Jenn Oliver at Jenn Cuisine is hosting a food blogger event to get the word out about donating.  Check out her post: Food Bloggers Support for Sandy

So... yeah, I haven't even talked about this Moroccan Carrot Dip.  My darling friend Mandy (who is also a fabulous cook) brought it to our Friendsgiving dinner last year and I was blown away by its brilliant flavors.  I felt like this was a good dish to make... the color alone will lift your spirits a bit.

Moroccan Carrot Dip

(adapted very slightly from the recipe by America's Test Kitchen via The New York Times)

Note: For the dip to have a brilliant orange color and clean flavor, it is important to avoid browning the carrots when cooking them in Step 1.

Ingredients

3 tablespoons extra-virgin olive oil 2 pounds carrots (about 12), peeled and sliced ¼ inch thick Salt Pepper 2 garlic cloves, minced 3/4 teaspoon ground coriander 3/4 teaspoon ground cumin 3/4 teaspoon ground ginger 1/8 teaspoon chili powder 1/8 teaspoon ground cinnamon 1/3 cup water 1 tablespoon white wine vinegar 1 tablespoon minced fresh parsley or cilantro

Directions

1. Heat 1 tablespoon of the oil in a large saucepan over medium-high heat until shimmering. Add the carrots and 1/2 teaspoon salt and cook until they begin to soften, 5 to 7 minutes. Stir in the garlic, coriander, cumin, ginger, chili powder and cinnamon and cook until fragrant, about 30 seconds. Add the water and bring to a simmer. Cover, reduce the heat to low, and cook, stirring occasionally, until the carrots are tender, 15 to 20 minutes.

2. Off the heat, mash the carrots with a potato masher, leaving a few coarse pieces for texture. Stir in the remaining 2 tablespoons oil and vinegar. Transfer to a bowl, cover, and refrigerate until the dip is chilled, about 30 minutes. Season with salt and pepper to taste, and sprinkle with the cilantro before serving. The dip can be refrigerated in an airtight container for up to 2 days. Season with additional vinegar, salt and pepper to taste and sprinkle with the cilantro before serving.

Yield: Makes about 2 1/2 cups.